
Appearance
Processing
The Processing tab (⌘6) is where you change the recording before it's decoded: cut it, fade it, EQ it, level it out, hold the loud parts down. It's the sixth tab, next to Sphere, Map, Speakers, Head and Mixer. For a converted recording it's the seventh.
Down the left is a list of tools, each with a one-line summary and its own on/off switch. Click a tool to open it. The tab remembers which one you left it on.
| Tool | What it does |
|---|---|
| Analyse | Listens to the recording once and says what's in it and where. See Analyse. |
| Trim & fades | Keeps one part of the recording, with a fade at each end, or a crossfade for a loop. |
| EQ | Eight bands on the whole recording. |
| Balance | Turns a part of the sphere up or down. |
| Tame | A compressor for each direction. |
The tools run in that order, ahead of the decode. Every output gets the same result: what you hear, and what goes into every file you export. They apply to the recording you have open. A batch doesn't use them.
Mid-Side plays as a stereo pair, so it has no EQ, no Balance and no Tame. The tool says so in its row.
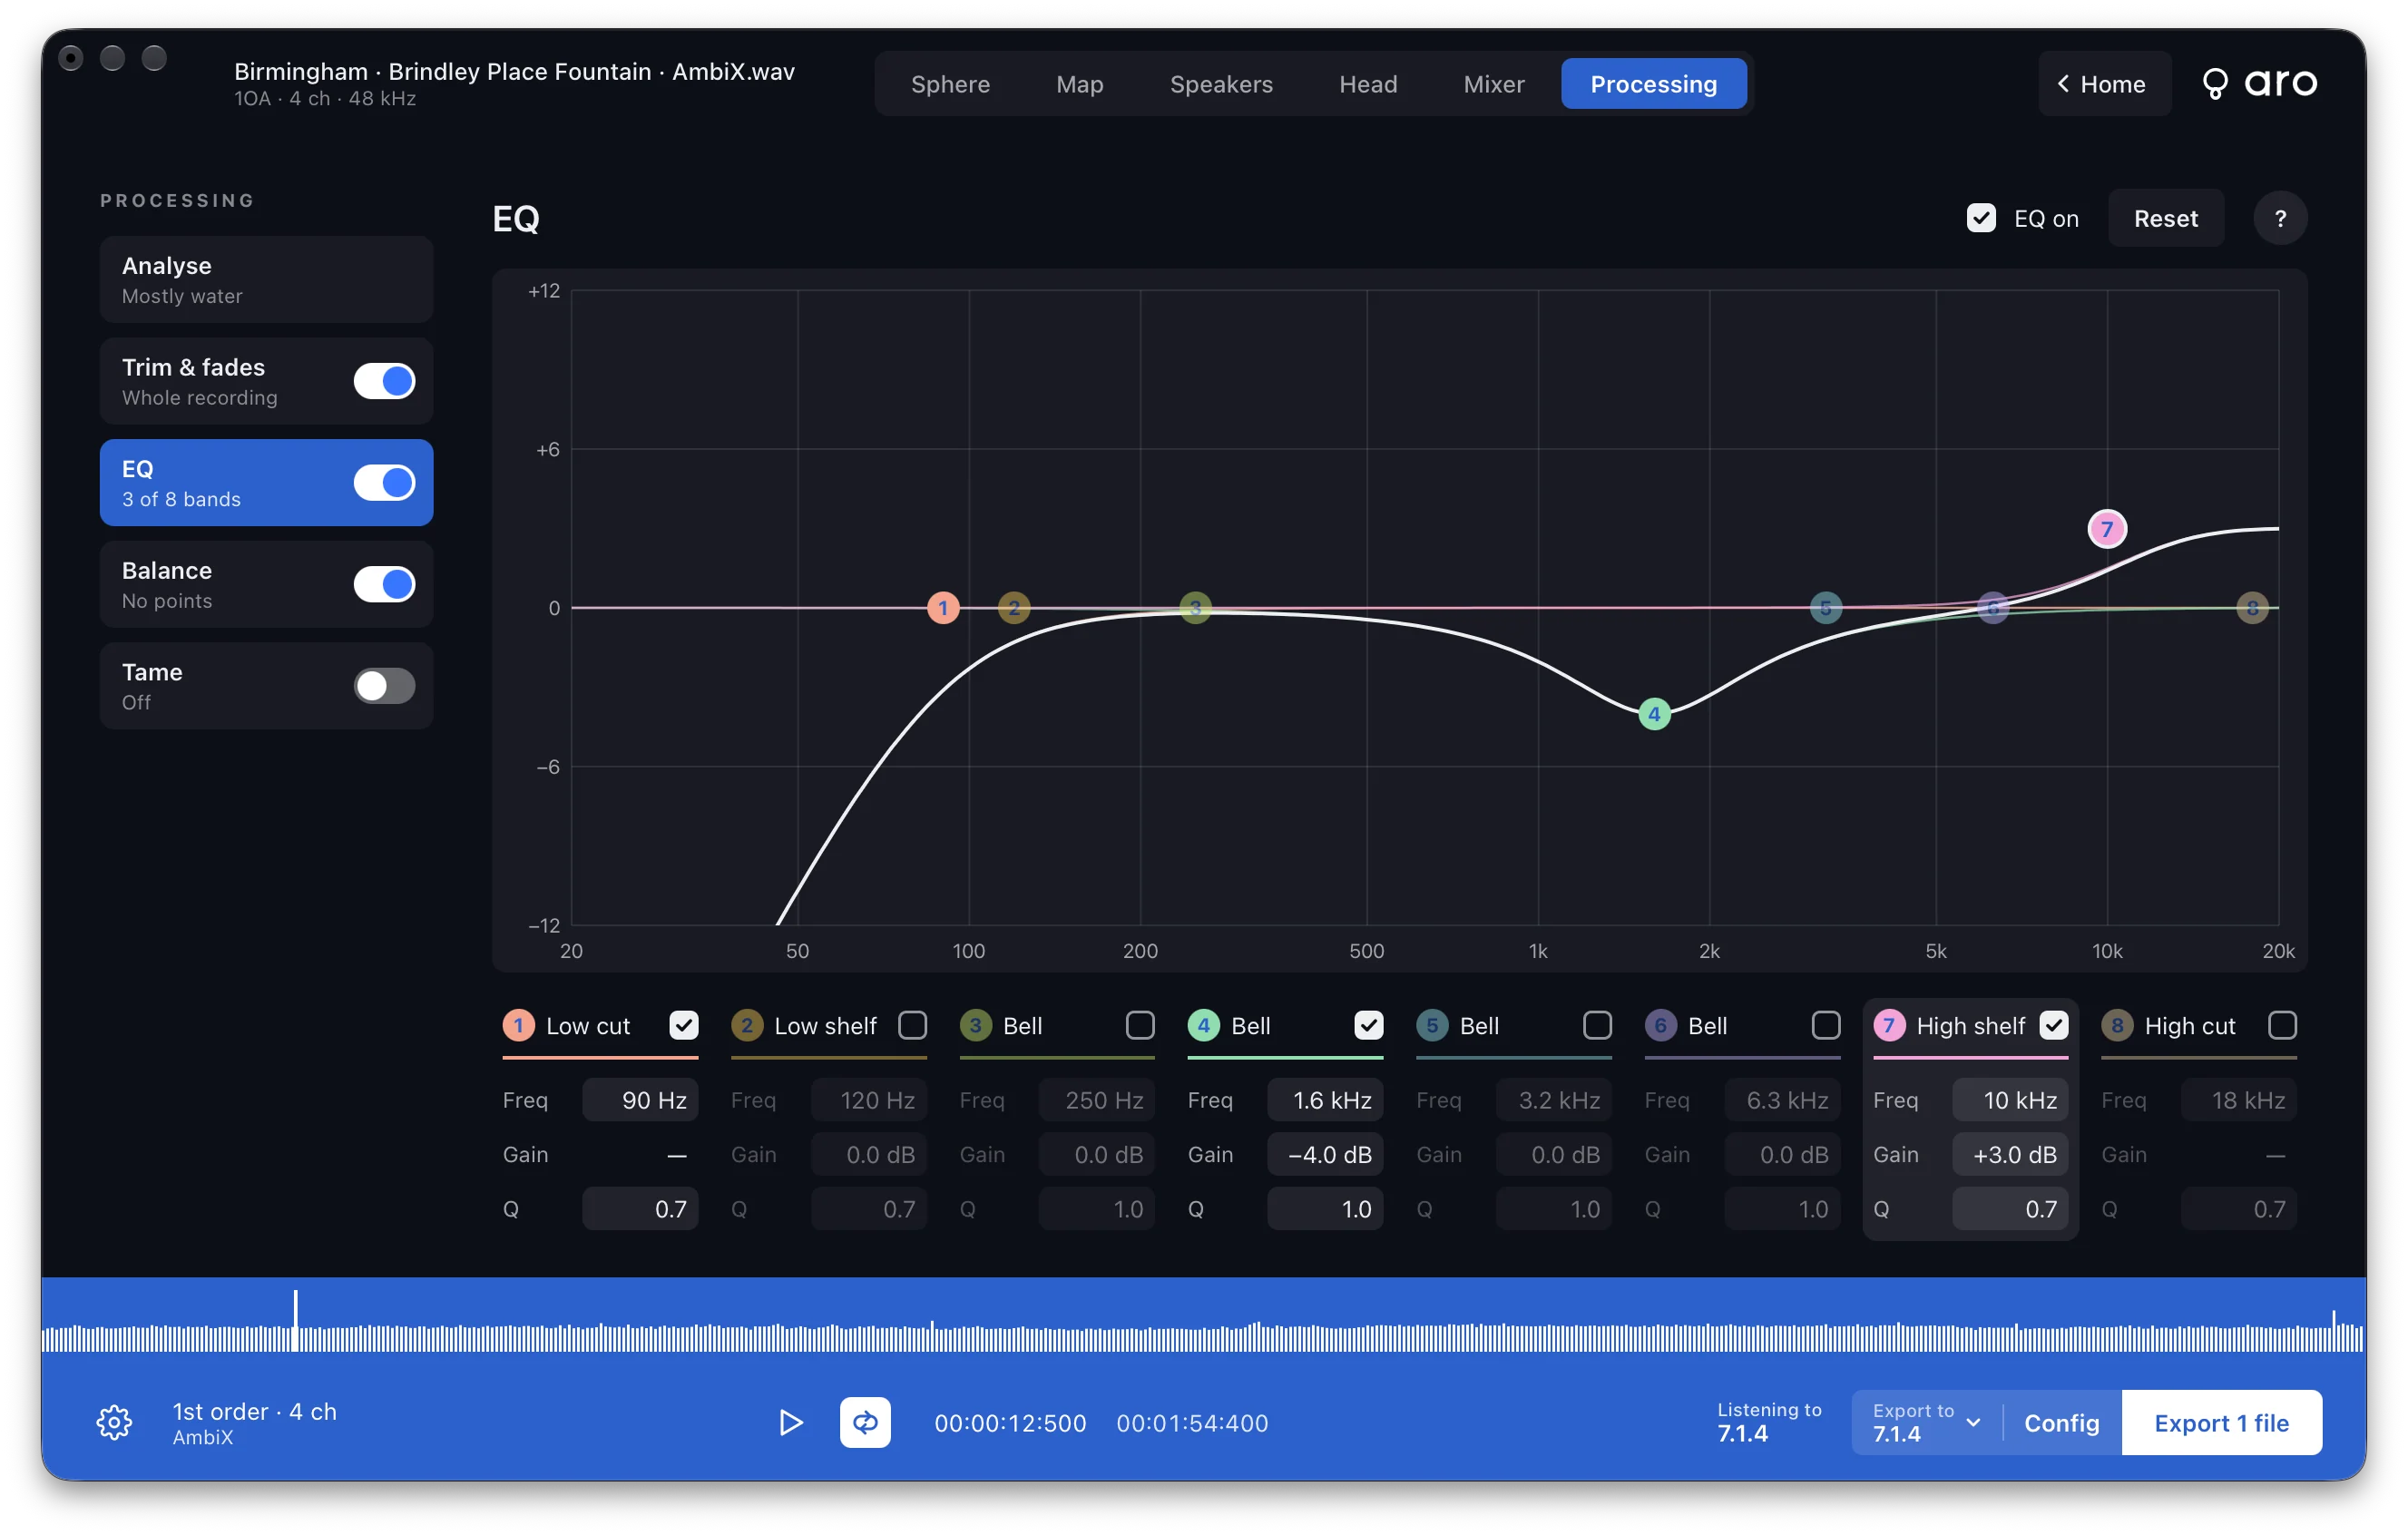
Each tool has a help button
The small help button at the top right of a tool lists its gestures in a few lines. It's quicker than this page once you know what you're after.
Trim & fades
Trim keeps one stretch of the recording. You only hear that stretch, and every export writes only that stretch. The recording itself keeps its length, so the clock and the waveform still line up.
The handles live on the waveform in the footer. While Trim & fades is open the waveform gets taller and fills in the fades. Under it is a strip with In, Out, Fade in, Fade out and Reset.
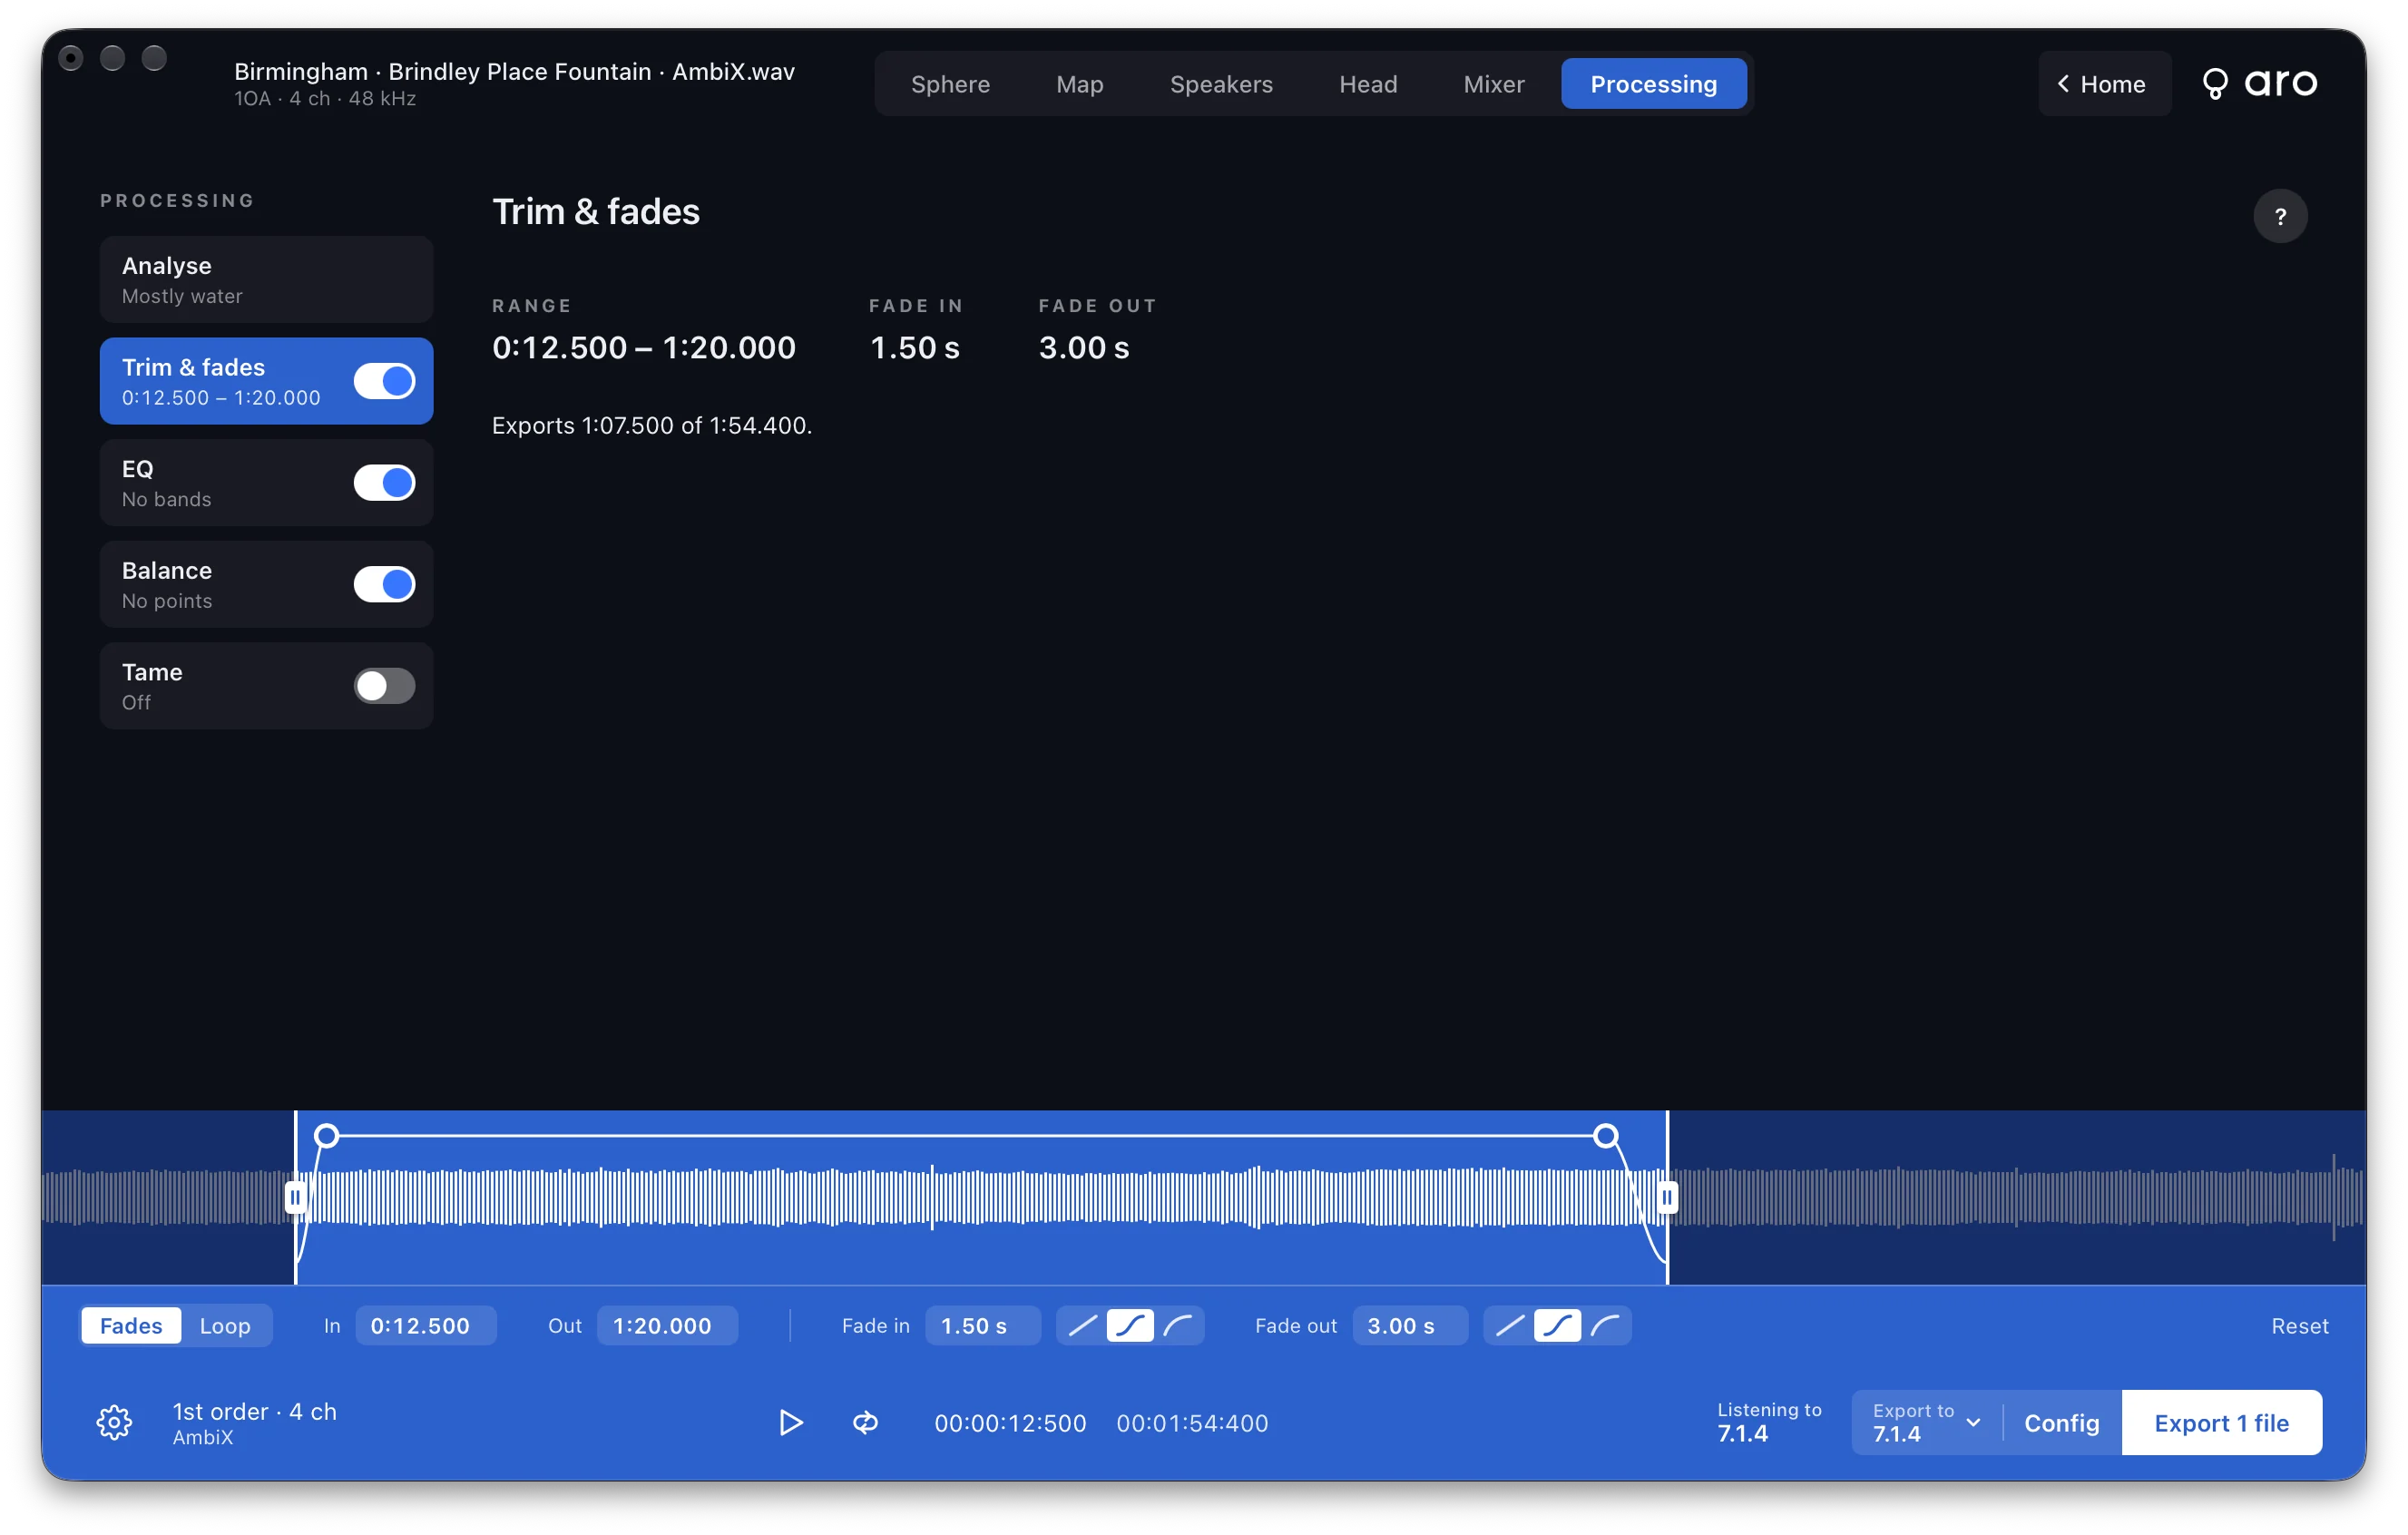
- Drag an edge of the range to move where it starts or ends. Each edge is the line with a grip halfway up.
- Drag a fade knob on the top line to set how long the fade is.
- Type a time in In or Out, such as
1.87,0:01.870or3:42. Type a length in a fade, such as20 msor1.5 s. A bare number is milliseconds. Enter sets it, Escape puts it back, and the up and down arrows step it. - With a handle focused, the arrow keys nudge it. Shift makes the step bigger.
Each fade has its own length and its own shape. Pick the shape from the three little curves next to the length:
- Straight
- Smooth, an S-curve. It's where both fades start.
- Even power
Fades work without a trim, too. Reset takes the range and the fades back to the whole recording.
Play starts at the start of the range, a click on the waveform stays inside the range, and playback stops at the end. Loop in the transport loops the range.
Loop mode
A game or an installation plays a sound round and round, and the join is where it shows. Turn on Loop in the strip's Fades | Loop switch and the two fades give way to one Crossfade. The last stretch of the range is laid over its start, so the file's last frame runs straight into its first.
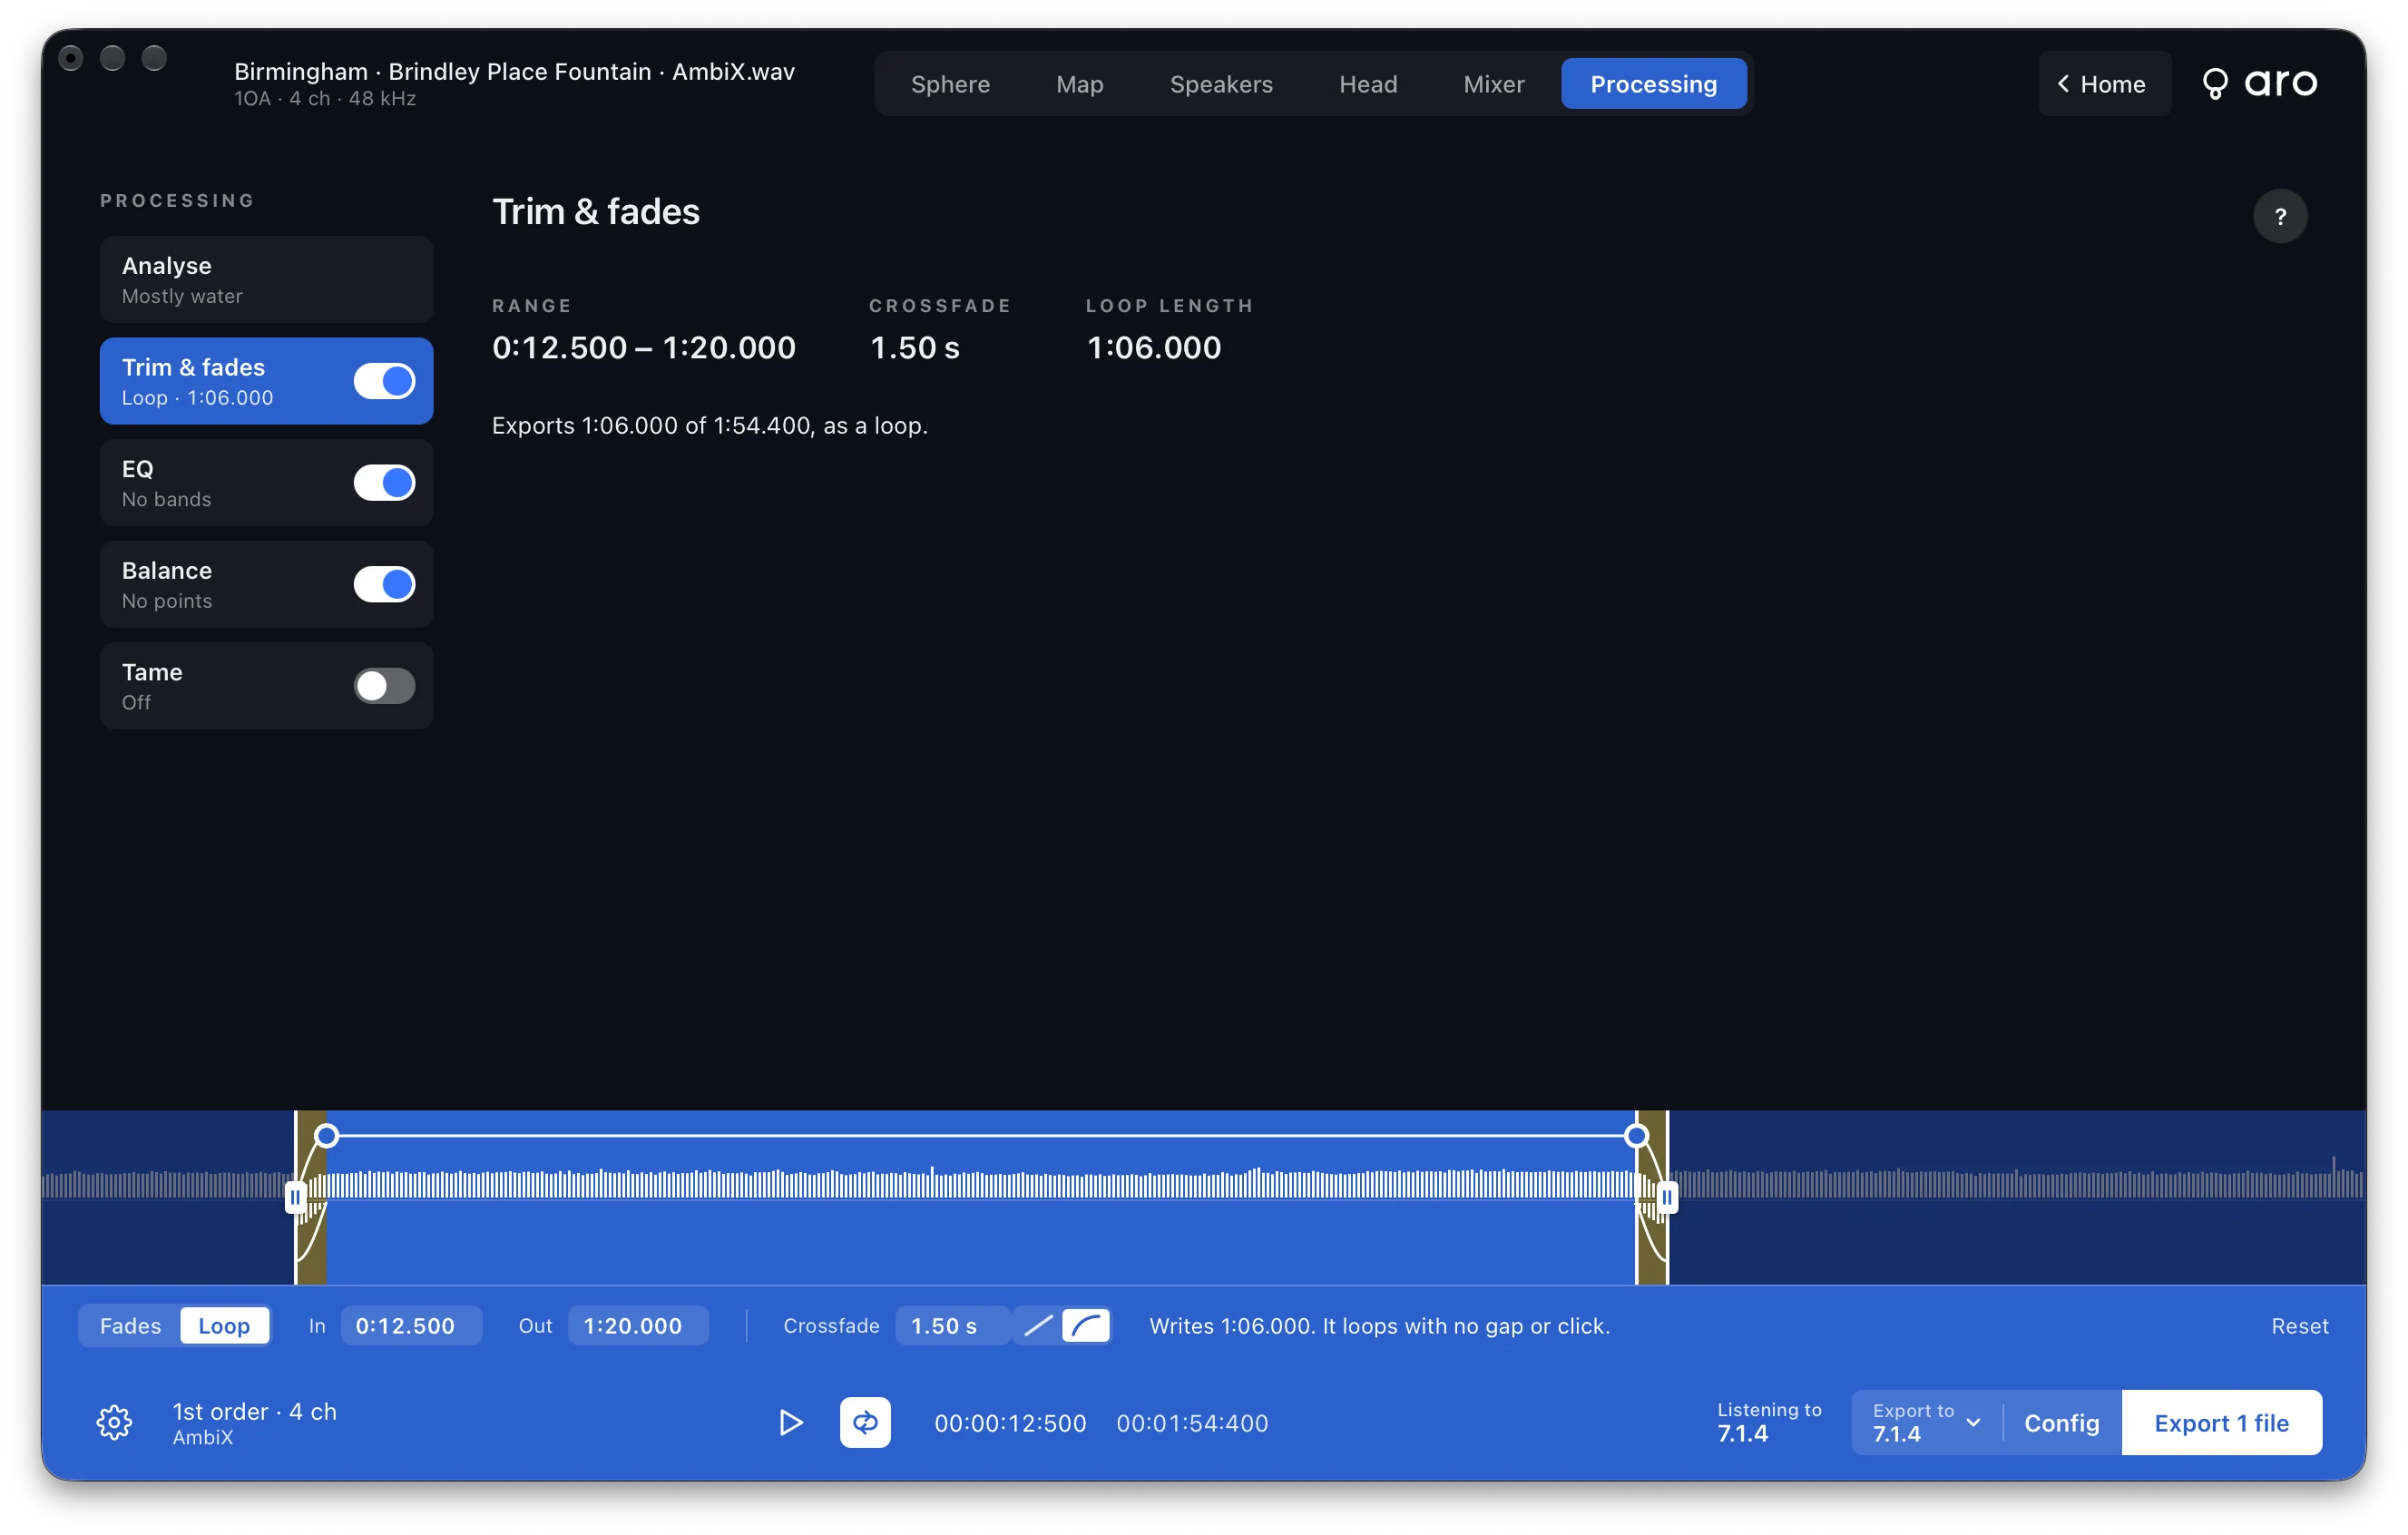
- Set the Crossfade length by typing it or dragging the round knob at the inner edge of either zone. It can't be more than half the range.
- The shape is Straight or Even power. Even power is the default, and it keeps unrelated ends, such as two bits of ambience, at an even level. Straight suits ends that are the same sound.
- The strip says what you'll get, for example "Writes 0:15.000. It loops with no gap or click."
- Turn on Loop in the transport to hear the join. Your fades come back when you switch back to Fades.
EQ
Eight bands on the whole recording. It used to live in Configuration. Configuration still has an EQ row, and it takes you here.
- Drag a point to set its frequency and gain.
- Scroll on a point to change its Q.
- Double-click a point to turn the band on or off.
- The boxes under the graph take typed values. EQ on turns the whole thing on or off, and Reset turns every band off.
Balance
Balance turns a part of the field up or down. The field is drawn flat, with back, left, front, right and back across the plot and up at the top, and the recording's energy shows on it as a heatmap. It uses the same heatmap settings as the Map tab, so one change reaches both. While nothing plays it shows the whole recording, before Balance and Tame. While it plays it shows the live field.
A switch at the top says who sets the balance: By hand or Auto.
By hand
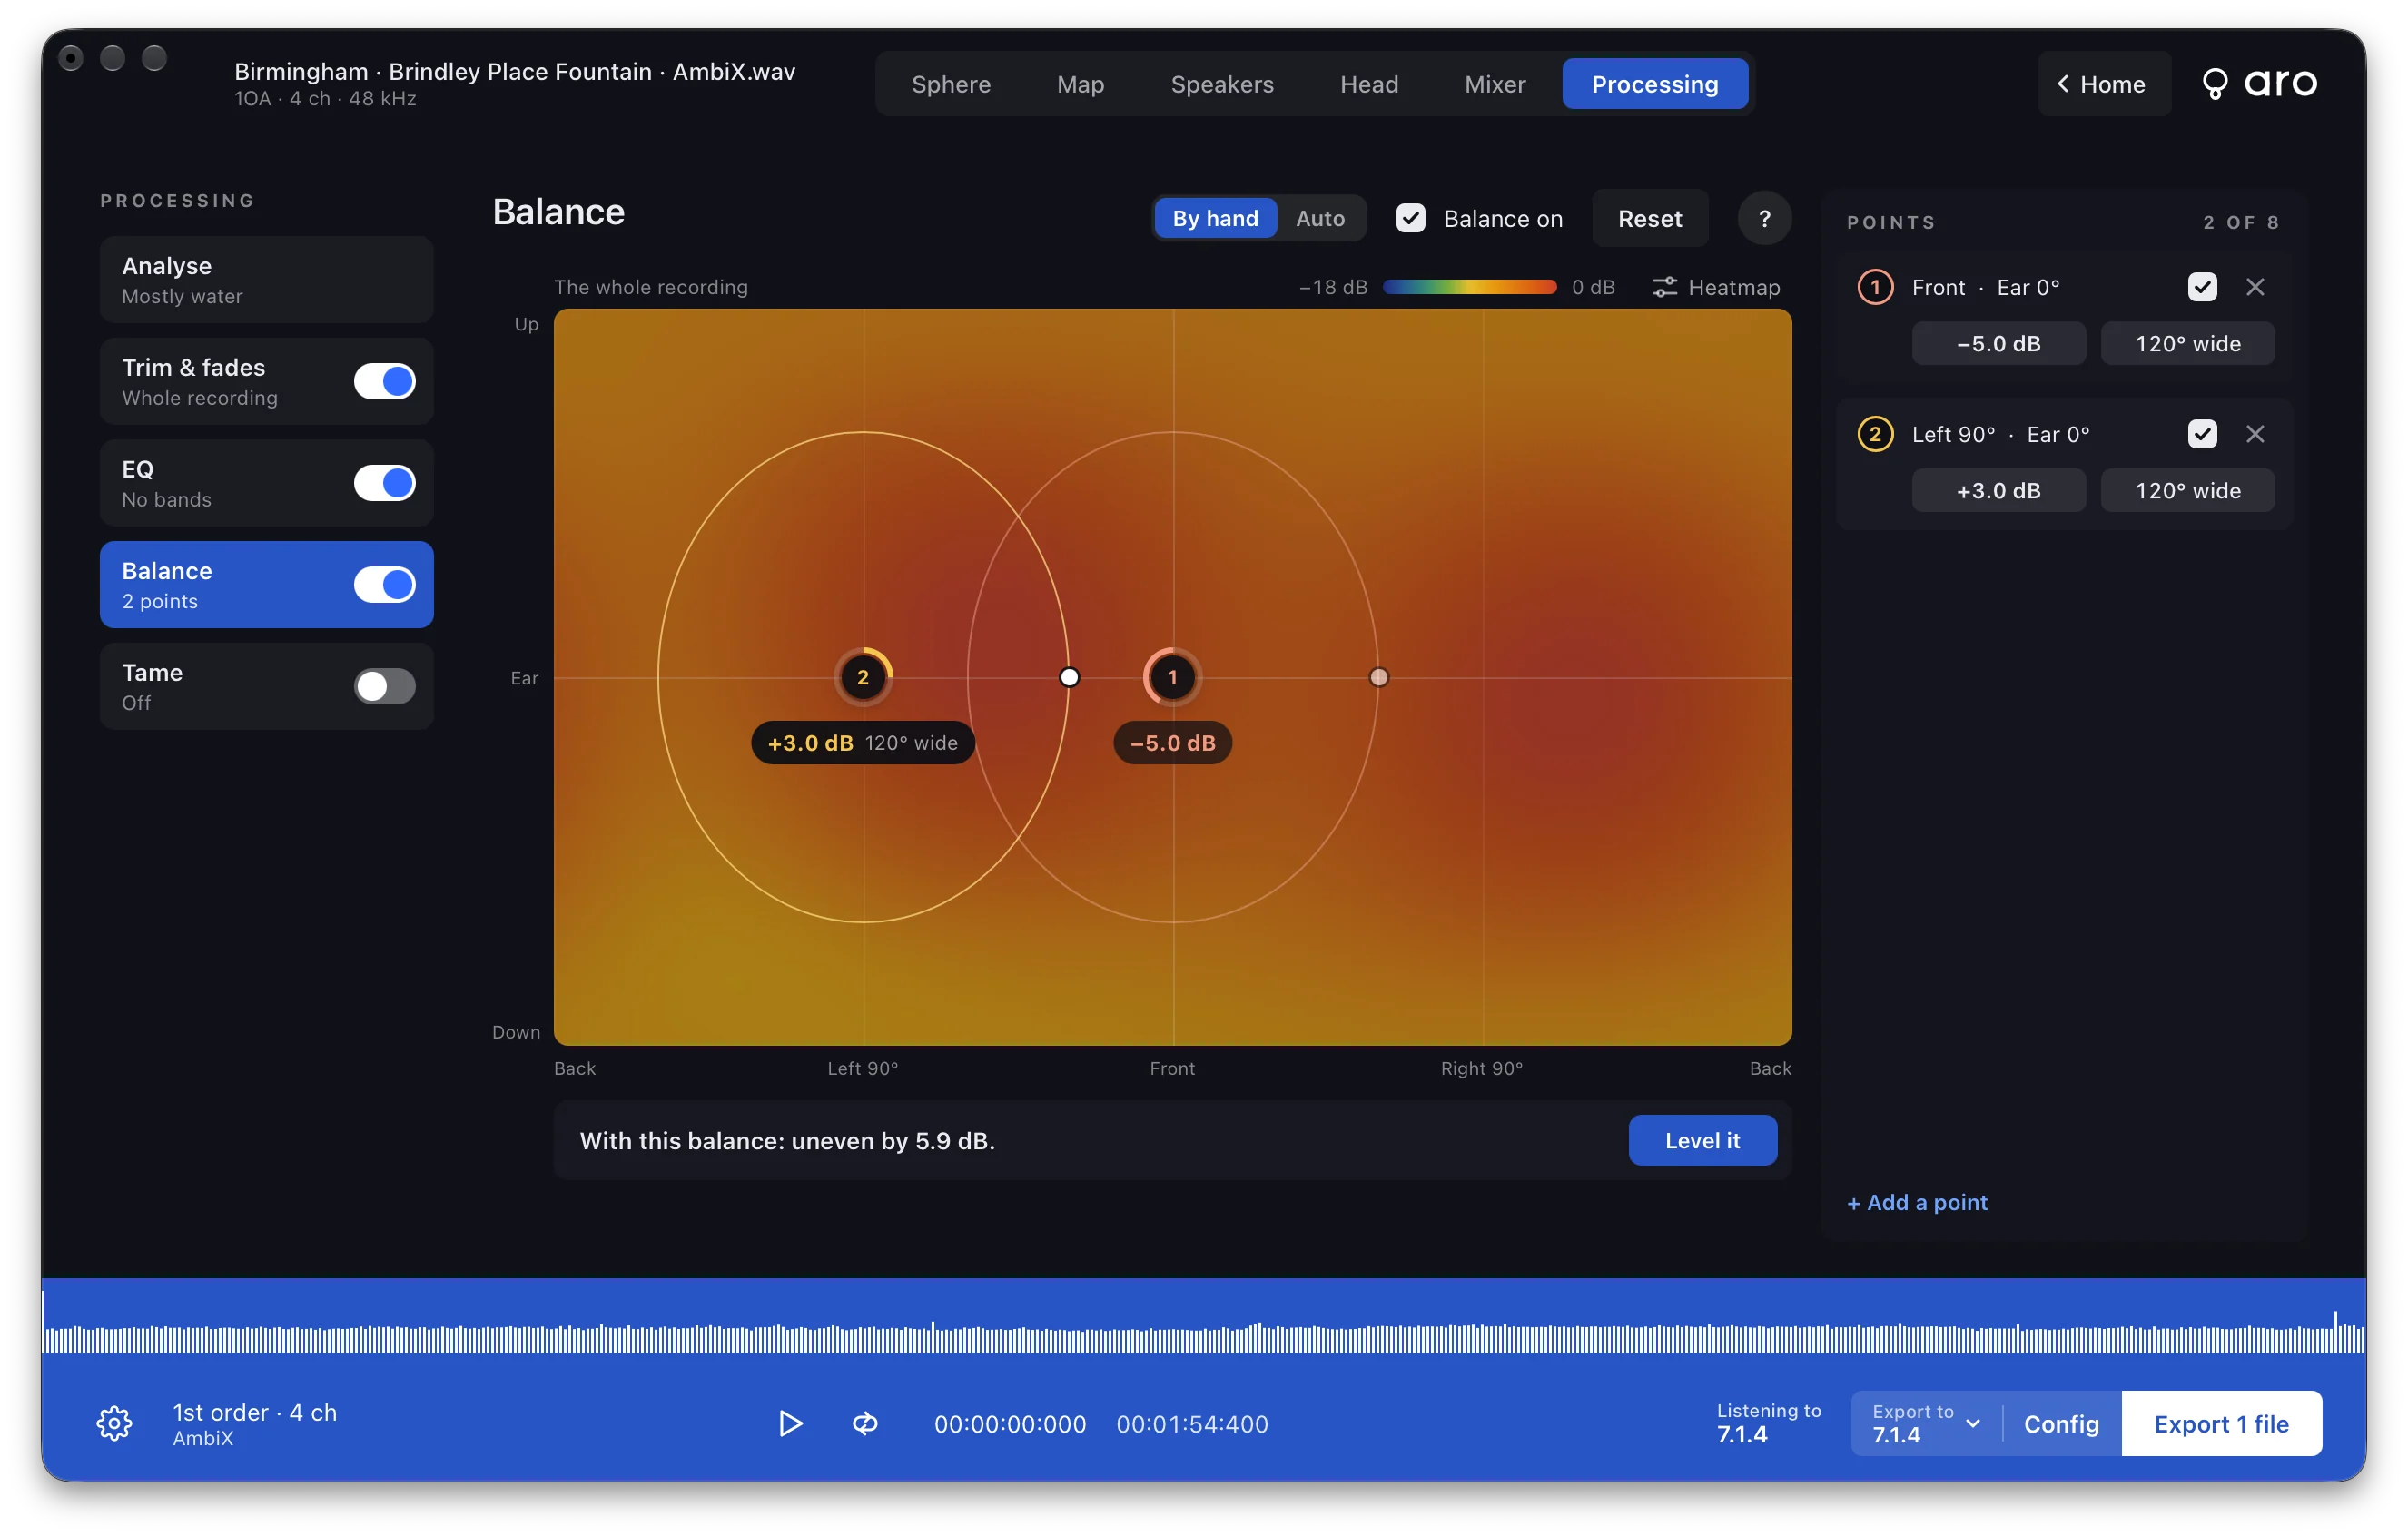
Press + Add a point. A new point sits at 0 dB, so it does nothing until you give it a level. You can have up to eight.
- Drag the point to where the sound is.
- Scroll on it for its level, up to 12 dB either way.
- Drag the dot on its edge for its width.
- Double-click it to turn it off and on.
- Click the level or width in the Points list to open a slider, or just type a value.
A point can't be narrower than the recording's order can resolve, and the tool tells you. At first order that's 120 degrees. At seventh it's 36. A point is never wider than 180.
Aro measures the whole recording in the background and tells you how uneven it is, for example "This recording is uneven by 3.4 dB: loudest front-left." Level it then sets points that even it out. Press it again and it sets them again, in place of its own earlier ones. Points you added yourself stay.
Auto
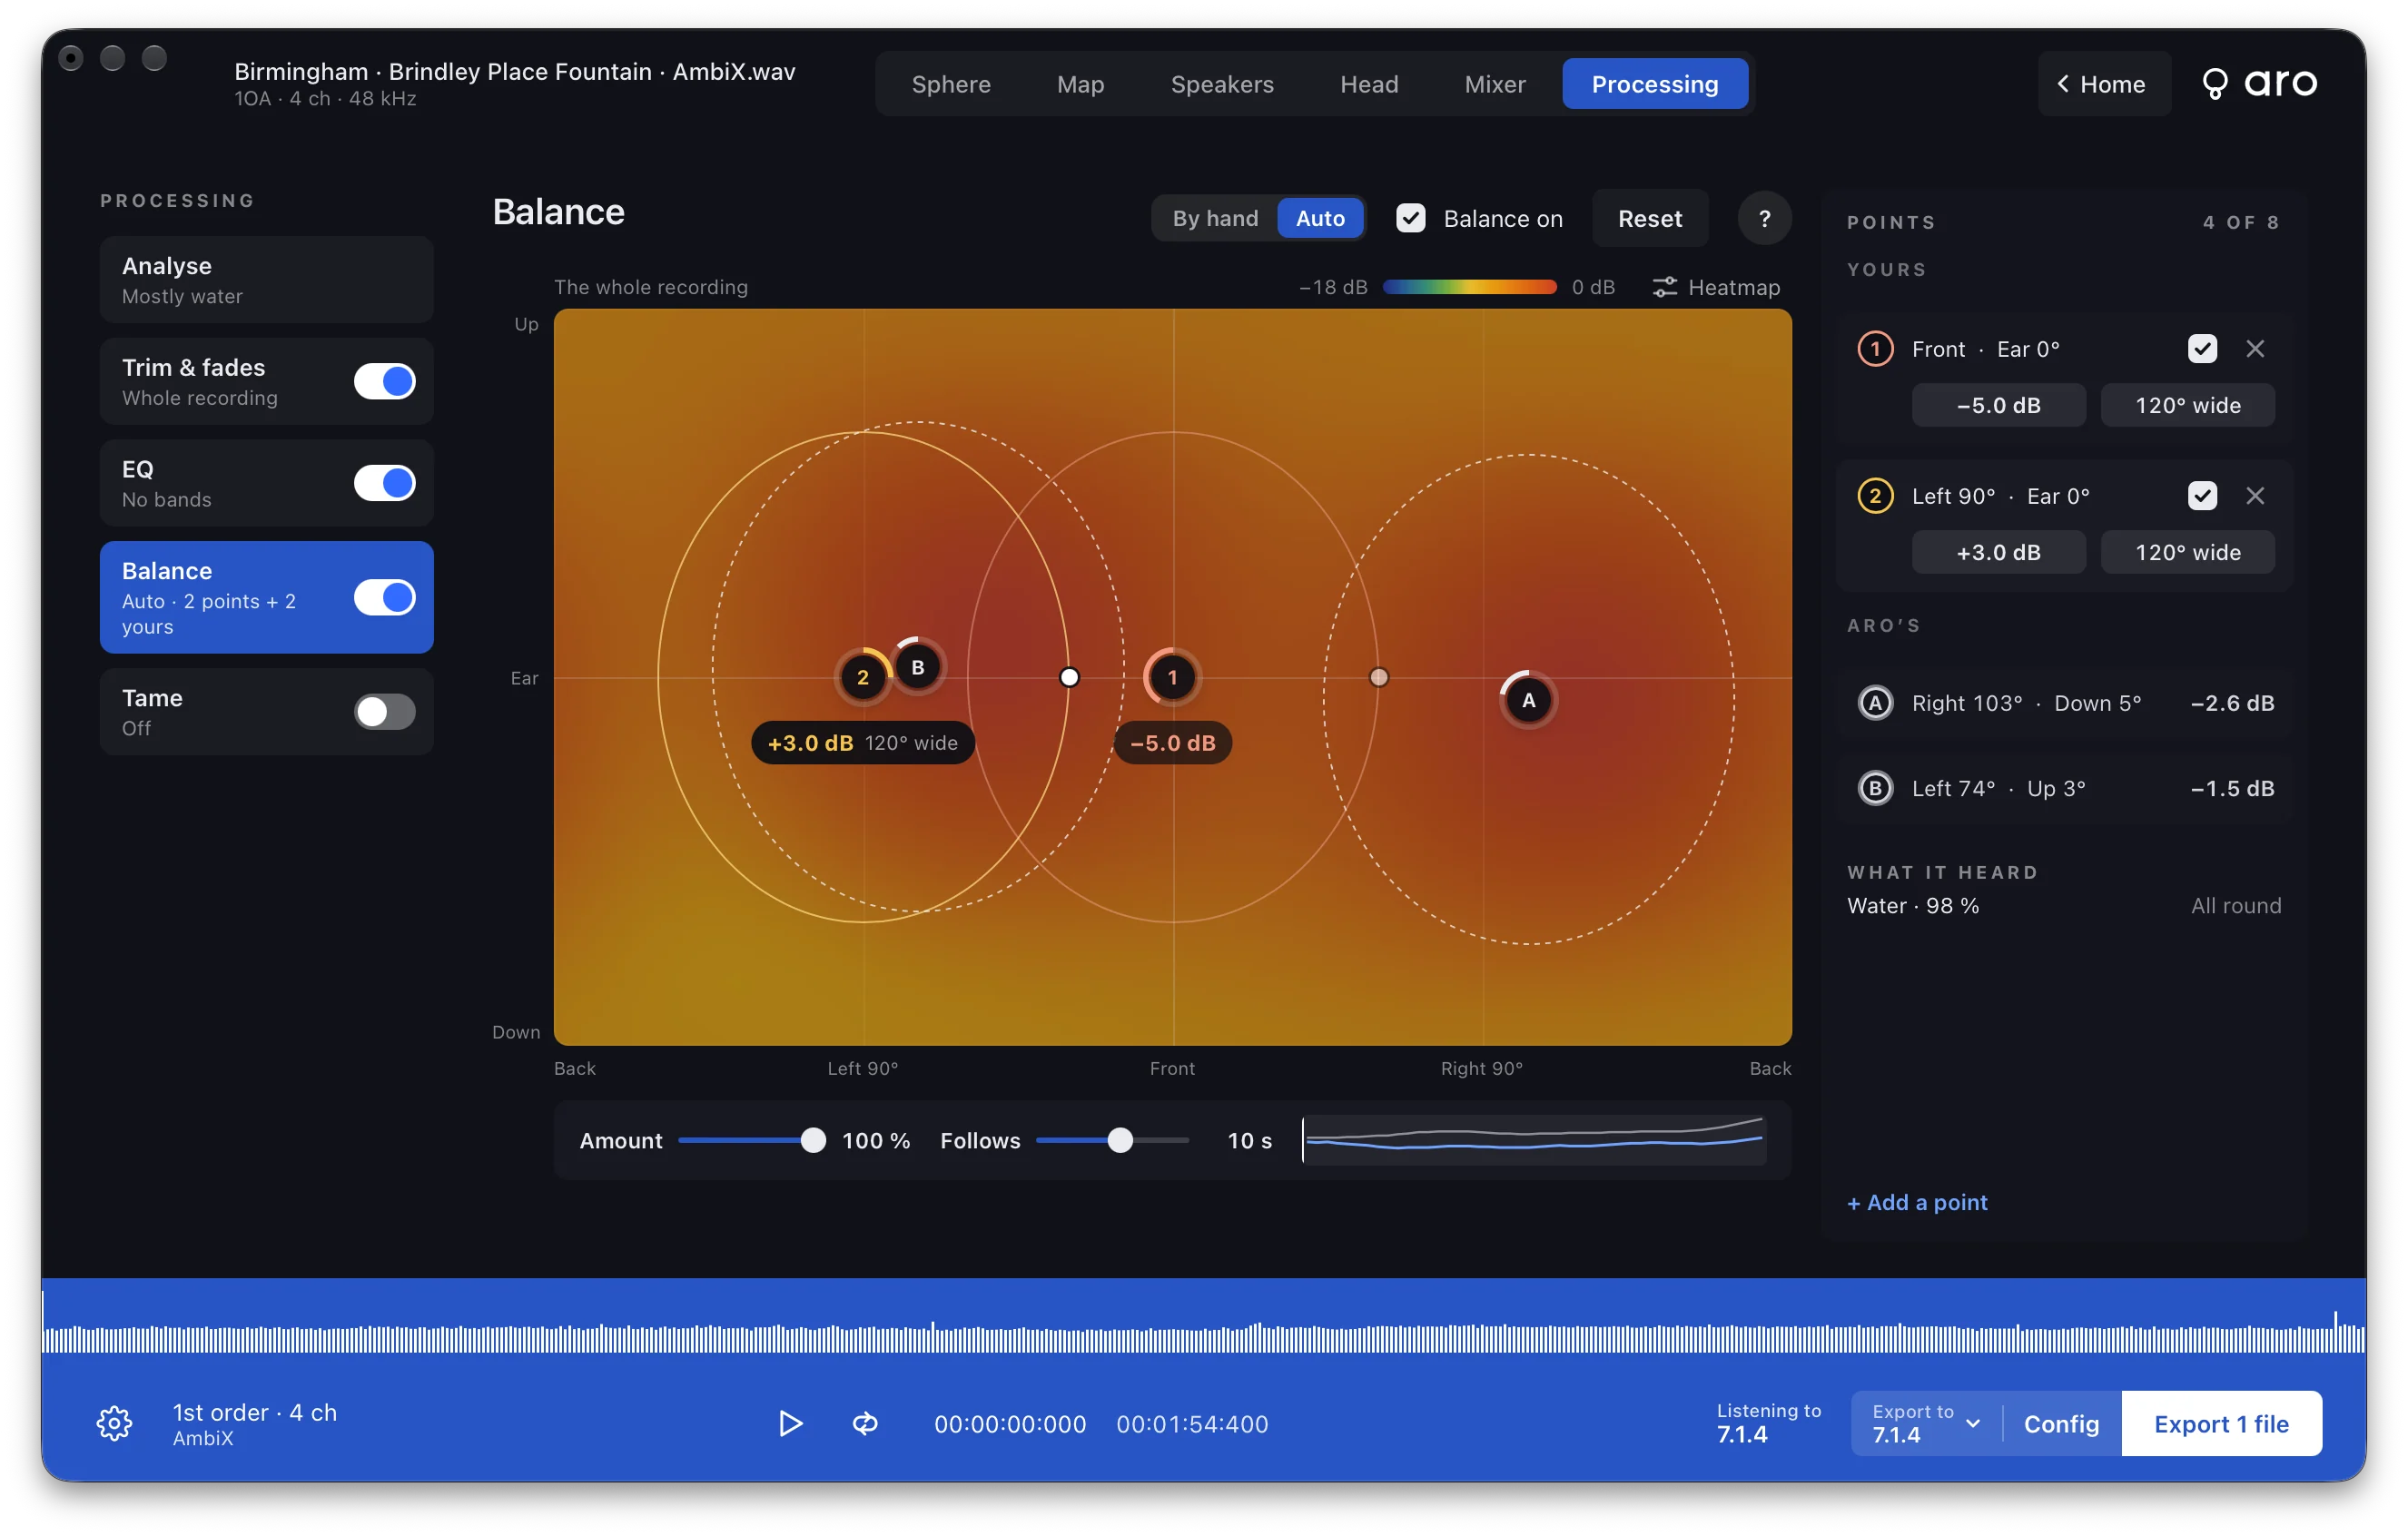
Choose Auto and Aro places its own points, lettered A, B, C and D, and moves their levels as the recording plays. It needs the analysis, so if there isn't one yet, pressing Analyse here runs it.
- Amount is how much of the correction you get, from 0 to 100 %.
- Follows is how slowly it reacts, in seconds. A bigger number gives steadier points.
- The timeline shows how uneven the recording is through its length, before and with Auto.
- Your own points sit beside Aro's, under Yours, and keep their places.
Auto levels the ambience and leaves the sound it heard as a voice or music alone. On a first-order recording it can't tell where a sound is finely enough, so it doesn't leave a subject alone there.
Balance is Aro's own measurement and processing. The sound recognition behind Analyse only says what was heard and where.
Tame
Tame is a compressor for each direction. Whatever stands above the Threshold line is pushed down towards it, and only while it's too loud. It works on first order too, where it's broad: a sound near a loud one gets turned down with it.
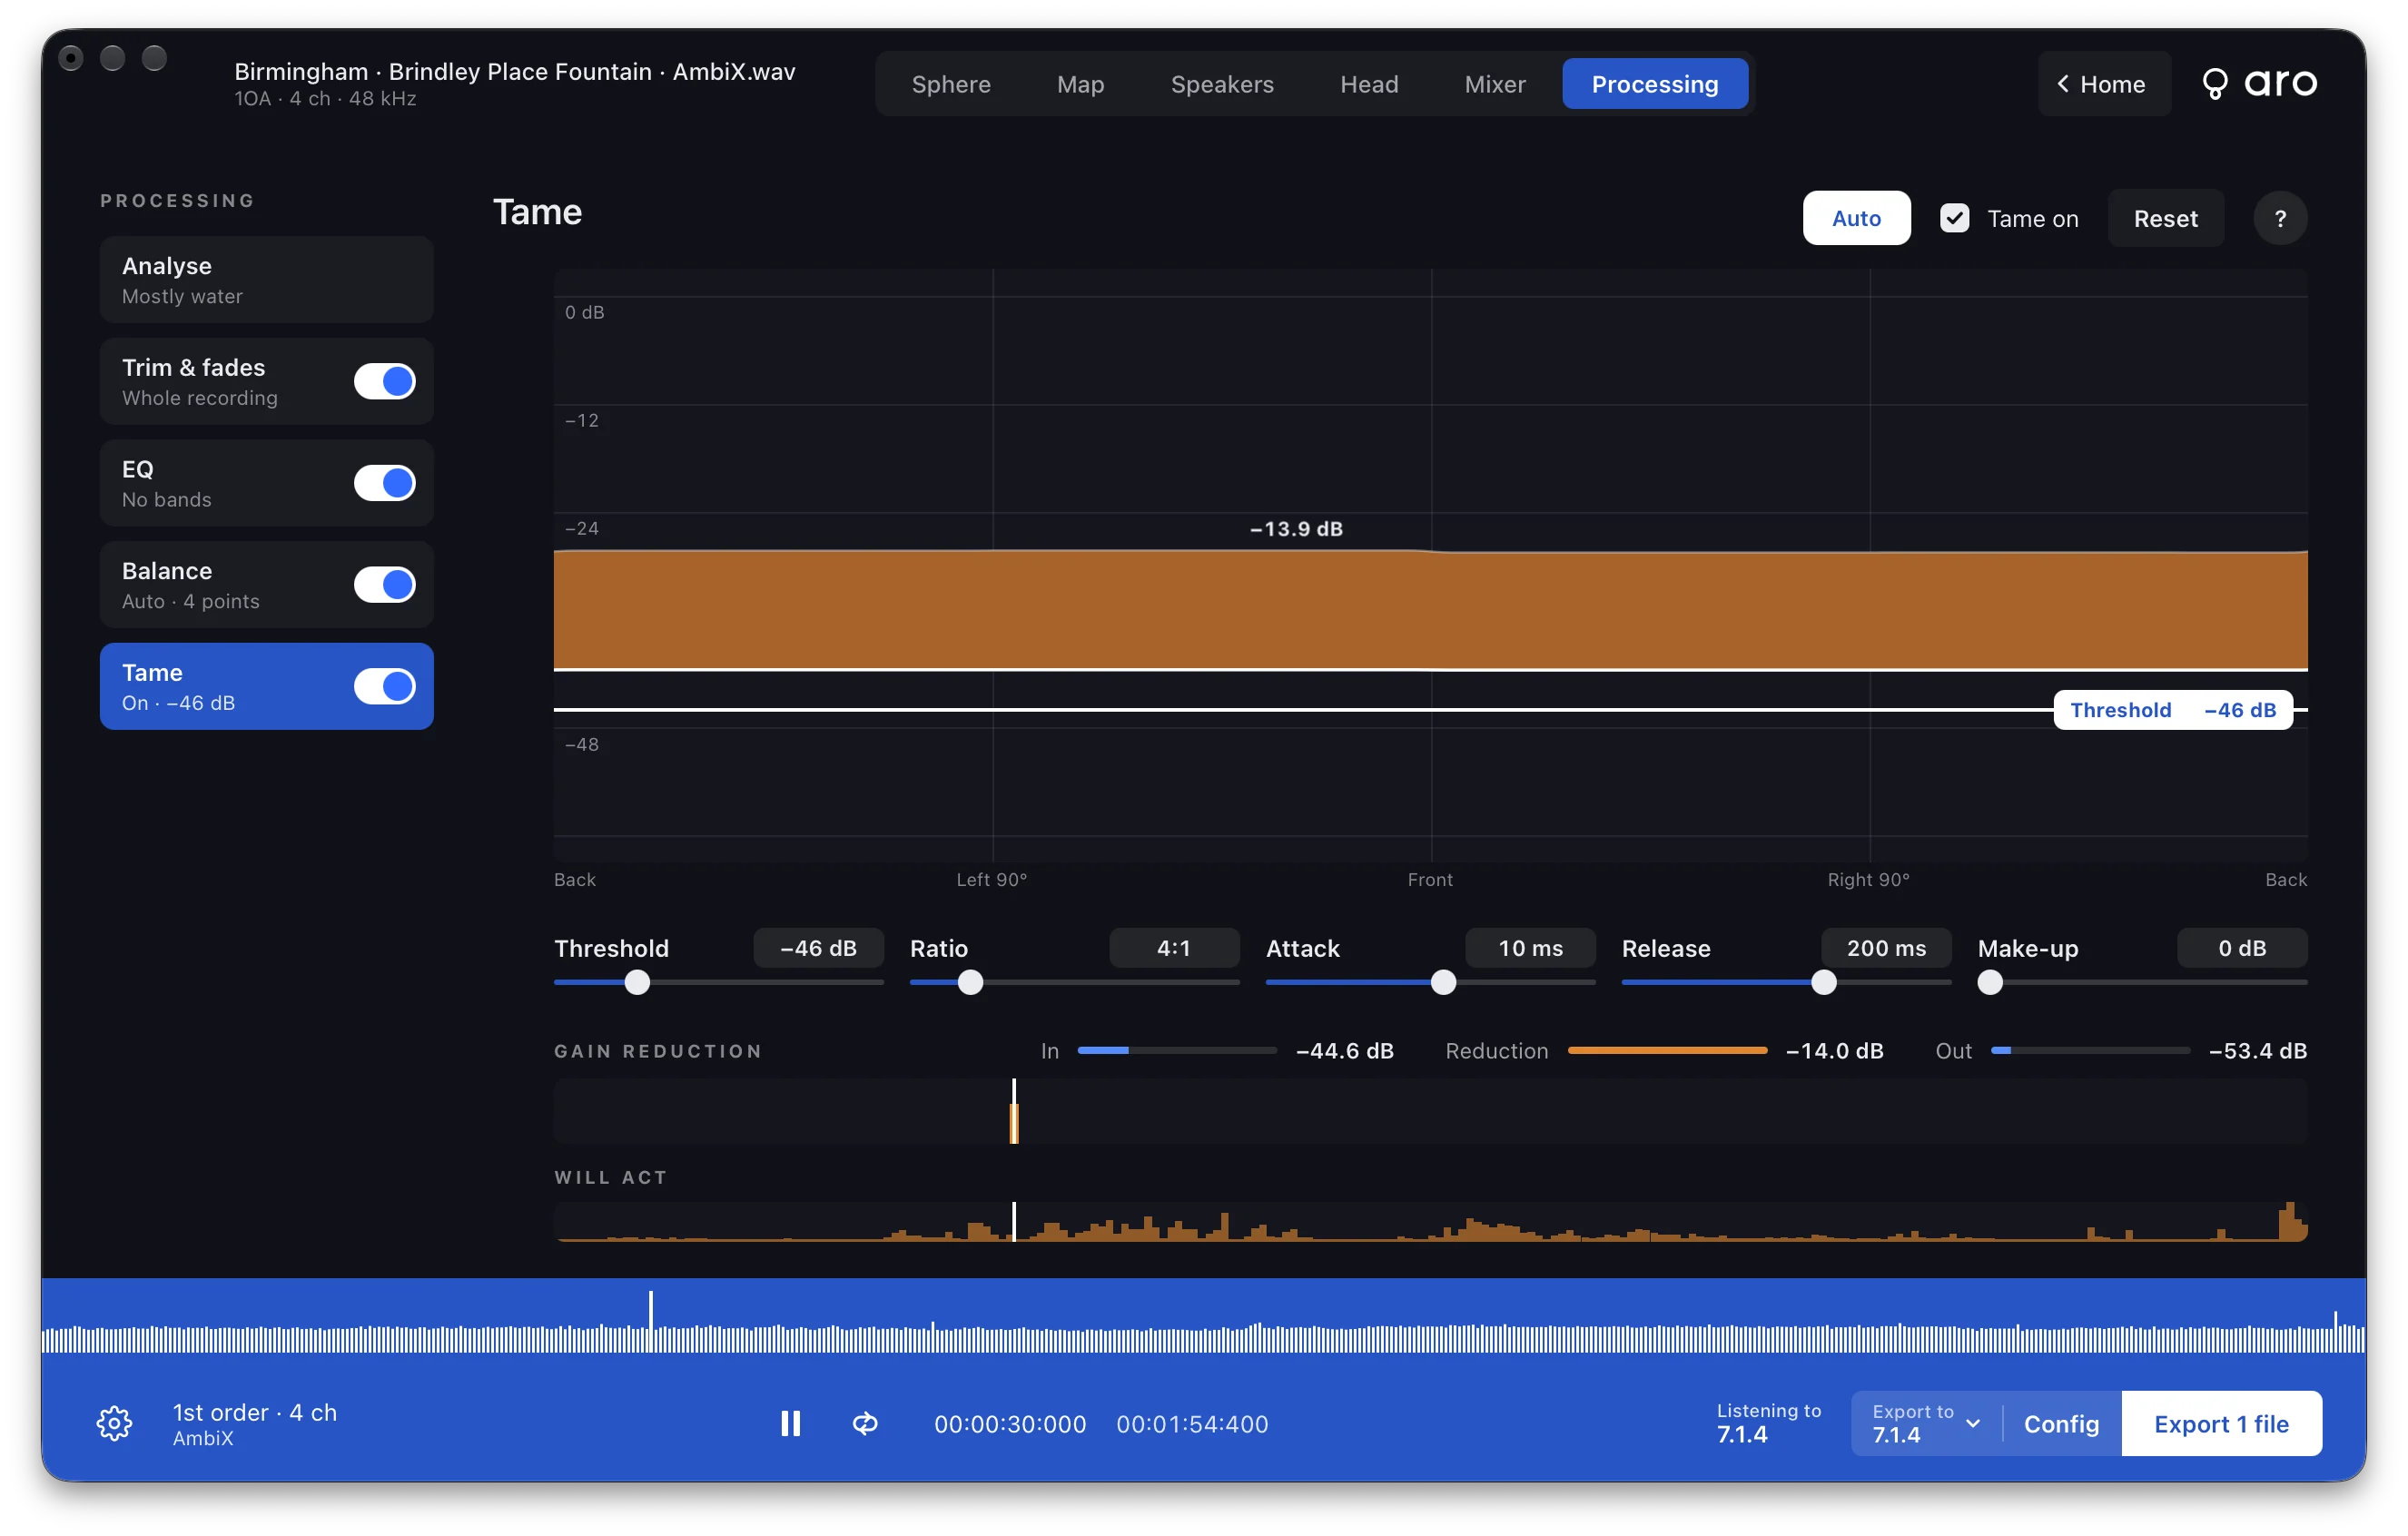
The graph runs across the horizon, back, left, front, right and back, with level going up the side. It shows the loudest height in each direction.
- A quiet line is the level as recorded.
- Flat amber is what's being taken off.
- A white line is what's left.
Drag the Threshold line up or down, or use the slider. It goes from −60 to 0 dB. A direction's level is the level of one source there, so a diffuse field reads a good deal lower than the recording's overall level.
The other controls:
- Ratio, 1 to 20.
- Attack, 0.1 to 500 ms.
- Release, 1 ms to 5 s.
- Make-up, 0 to 24 dB, to turn the whole recording up after the compression.
Auto sets the first four from the analysis. Move any of them and they're yours. Tame on turns it on and off, and Reset puts everything back.
Three meters sit under the controls. In and Out are the whole recording's level going in and coming out, make-up included. Reduction is the most any direction is turned down right now. Under them, Gain reduction fills in as you play and Will act predicts where the threshold will bite.
A sound that starts suddenly passes for the attack time before it's held, so a shorter attack catches it sooner.