Appearance
Markers
Pro
Markers is an Orbit Pro feature.
Markers are extremely useful for QC and listening sessions. Drop them at glitches, level concerns, or anywhere you want to flag for revisit — keep them for reference later, or export them with your PDF report.
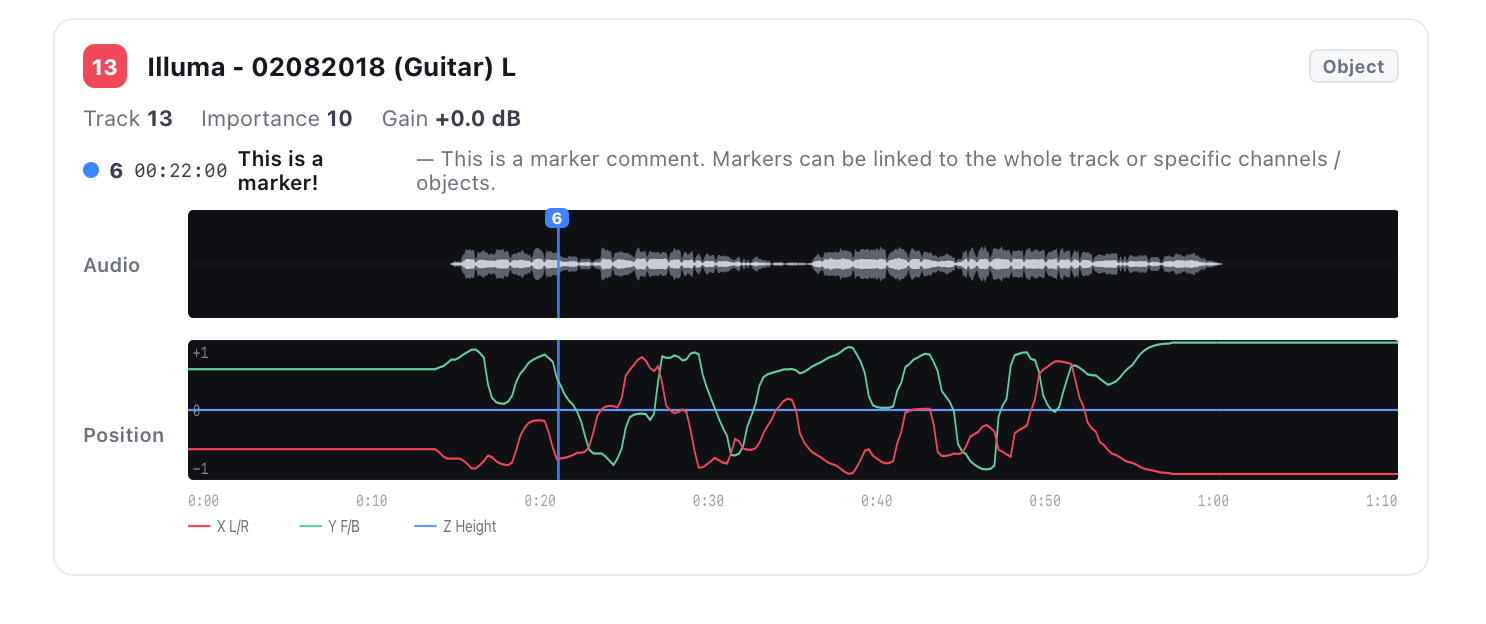
Unlike markers in a standard audio app, Orbit lets you link a marker to specific channels, beds, scenes and object elements, each with its own title and comment. It's an understated but powerful tool.
Adding a marker
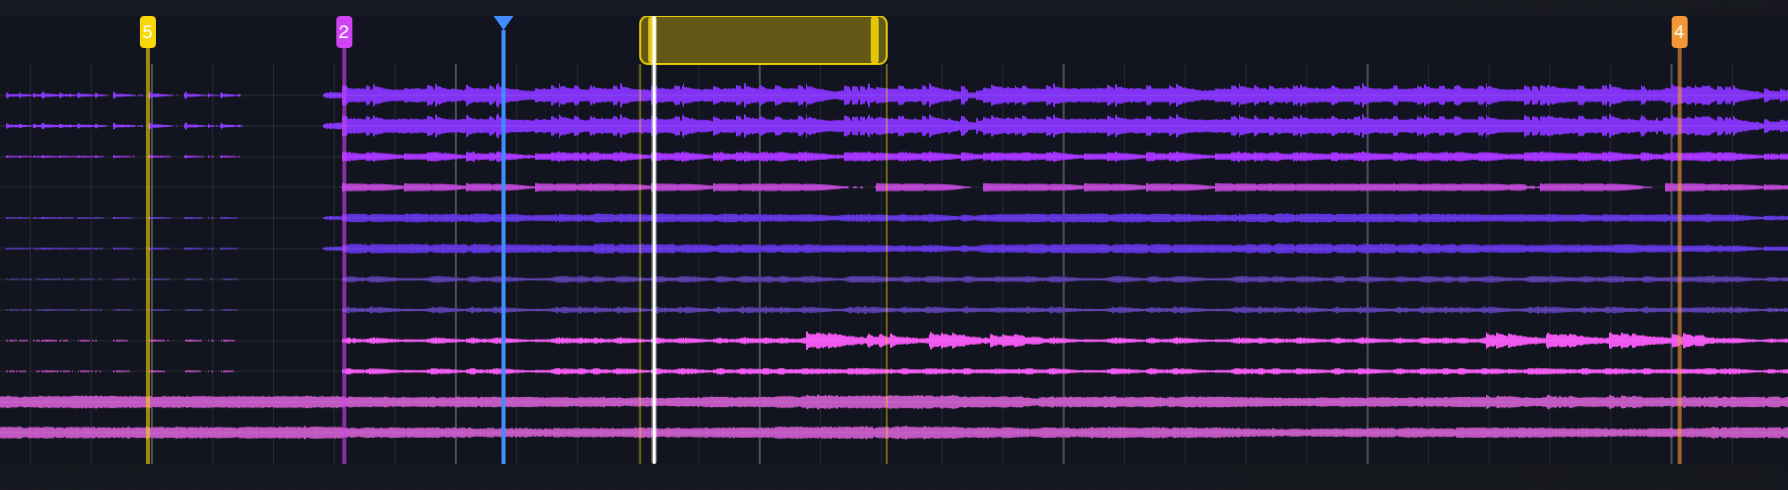
Position the playhead where you want the marker and press ⇧M. This opens the marker modal.
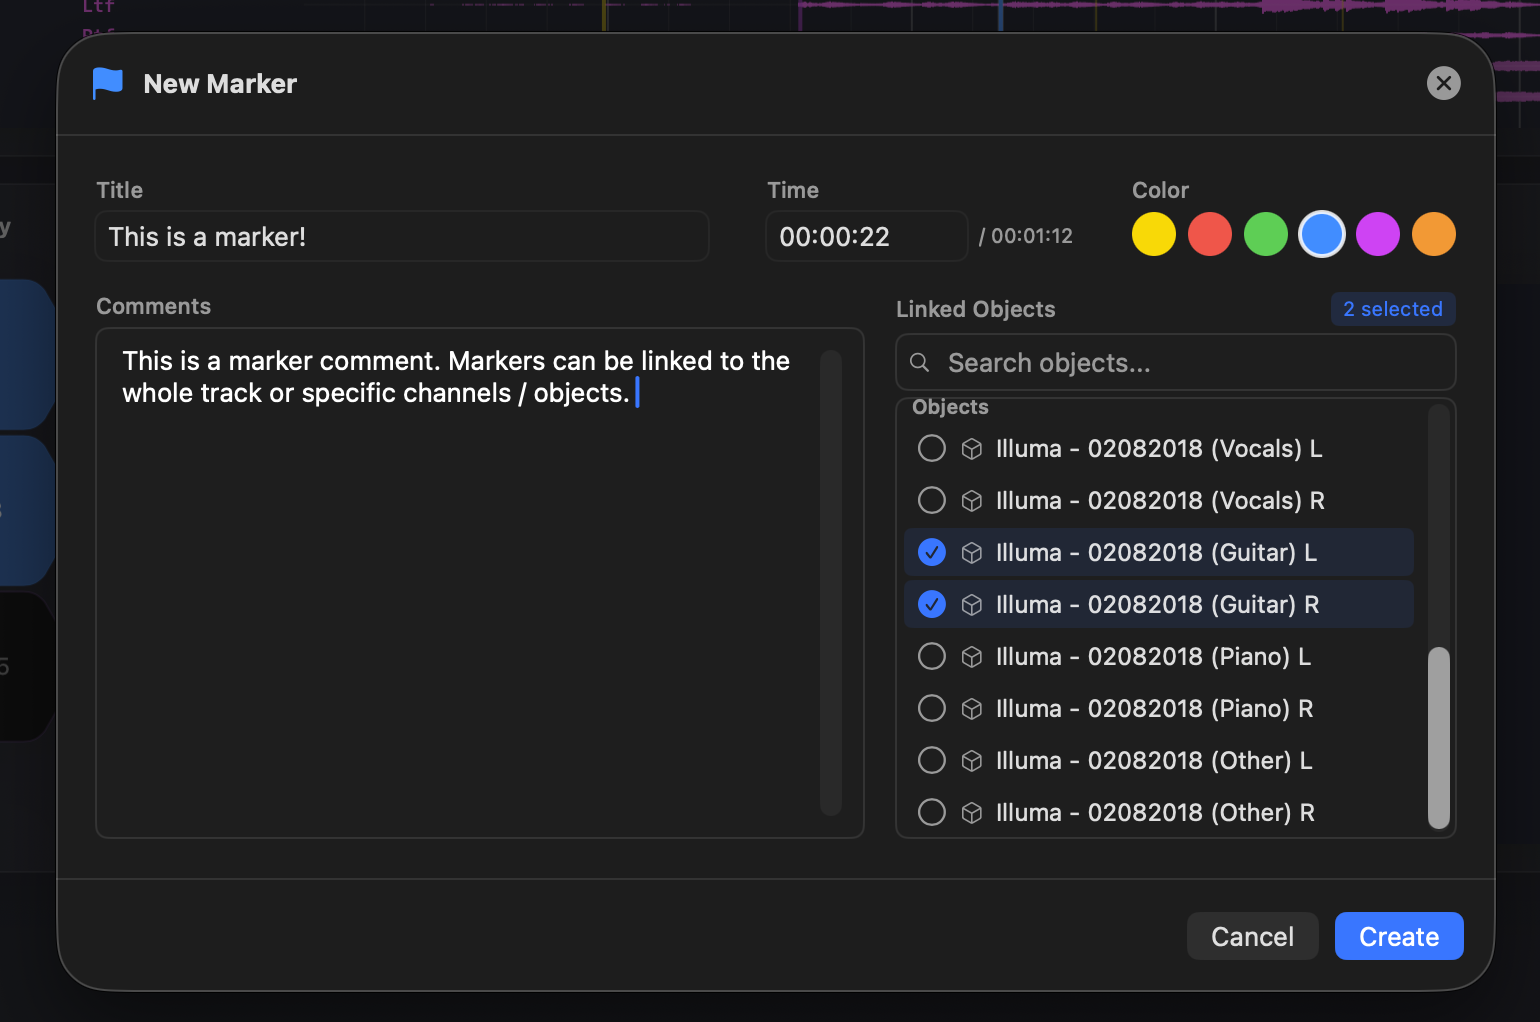
Give it a title and a comment, then either:
- Create the marker without linking to attach it to the whole session, or
- Link it to specific elements using the Linked Objects selector on the right.
A marker can be linked to as many elements or channels as you like. Beds are linked per bed channel; objects are linked individually. Pick a colour to categorise markers at a glance.
Editing and moving markers
- Edit — double-click a marker to reopen the marker modal.
- Move — hold ⇧ (Shift) and drag the marker along the timeline.
The marker list
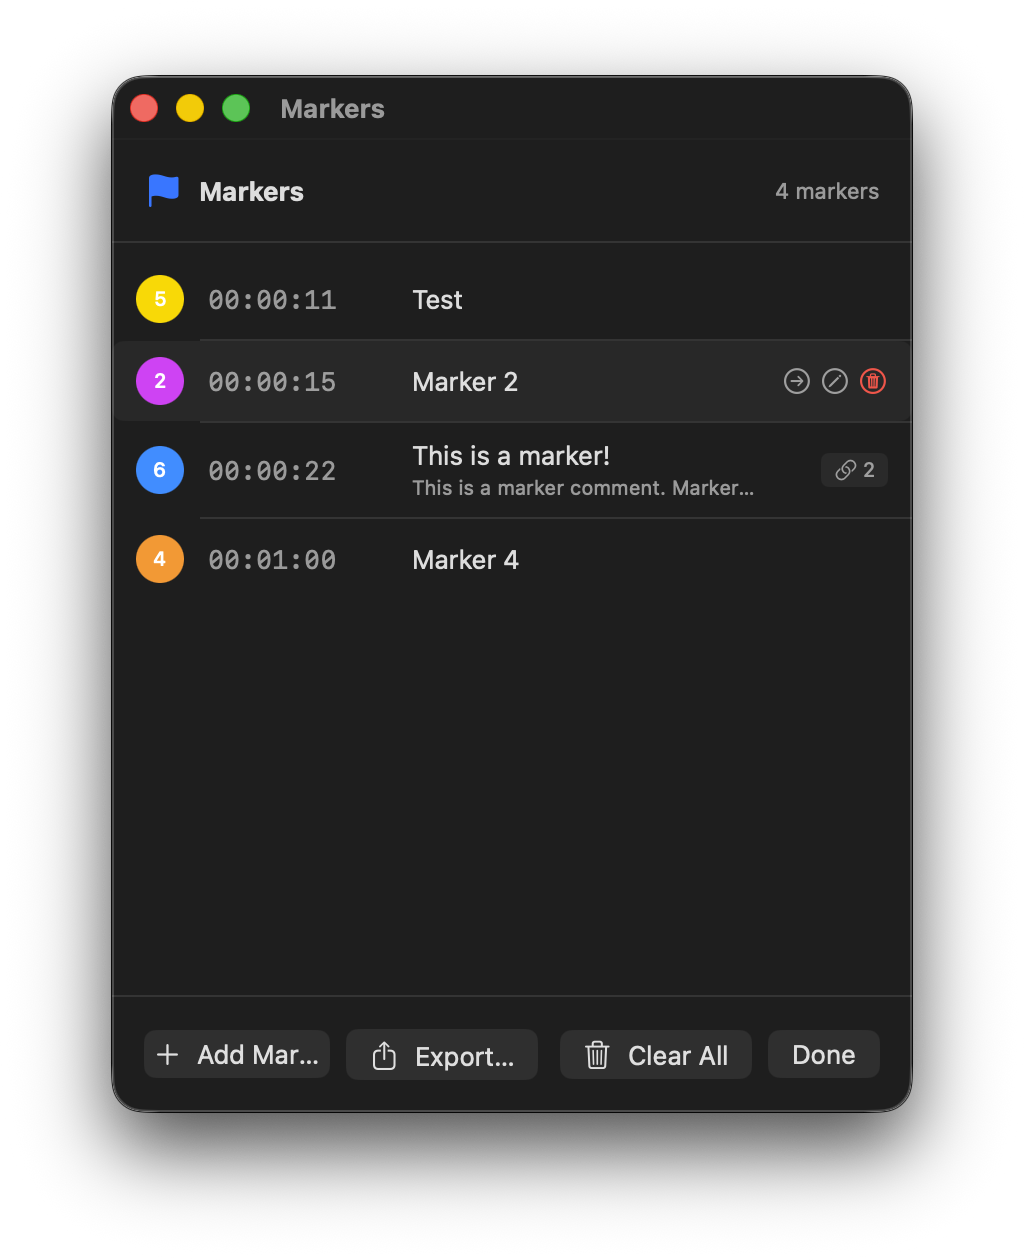
To see every marker in your session, open the marker list with ⌘⇧M. From here you can manage, delete, export as a CSV, clear, or jump to any marker in your session.
Markers in the PDF report
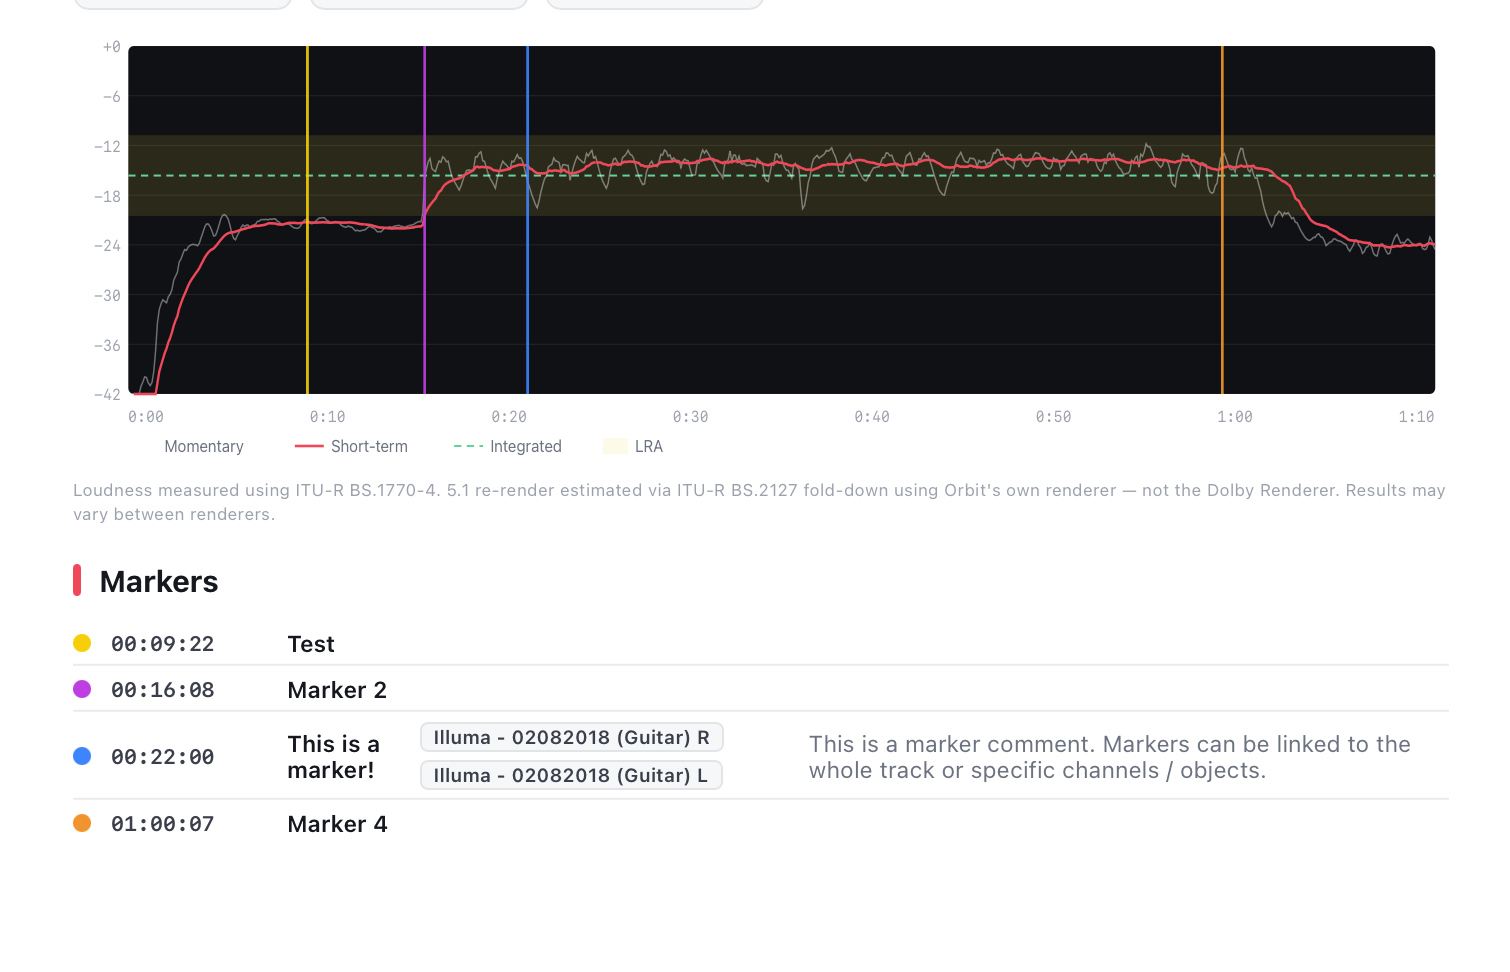
Markers can also be exported with your PDF report. Add some markers to your session, then open the PDF exporter with ⌘⇧E. The report includes marker lines on the loudness graph, a full list of markers, and each linked marker shown against its element.
Keyboard shortcuts
| Shortcut | Action |
|---|---|
| ⇧M | Add a marker at the playhead |
| ⌘⇧M | Open the marker list |
| ⌘⇧E | Open the PDF exporter (includes markers) |
TIP
Use colours to categorise as you go — for example one colour for level issues, another for spatial/positioning notes — so the marker list and PDF report read at a glance.