Appearance
Appearance Preferences
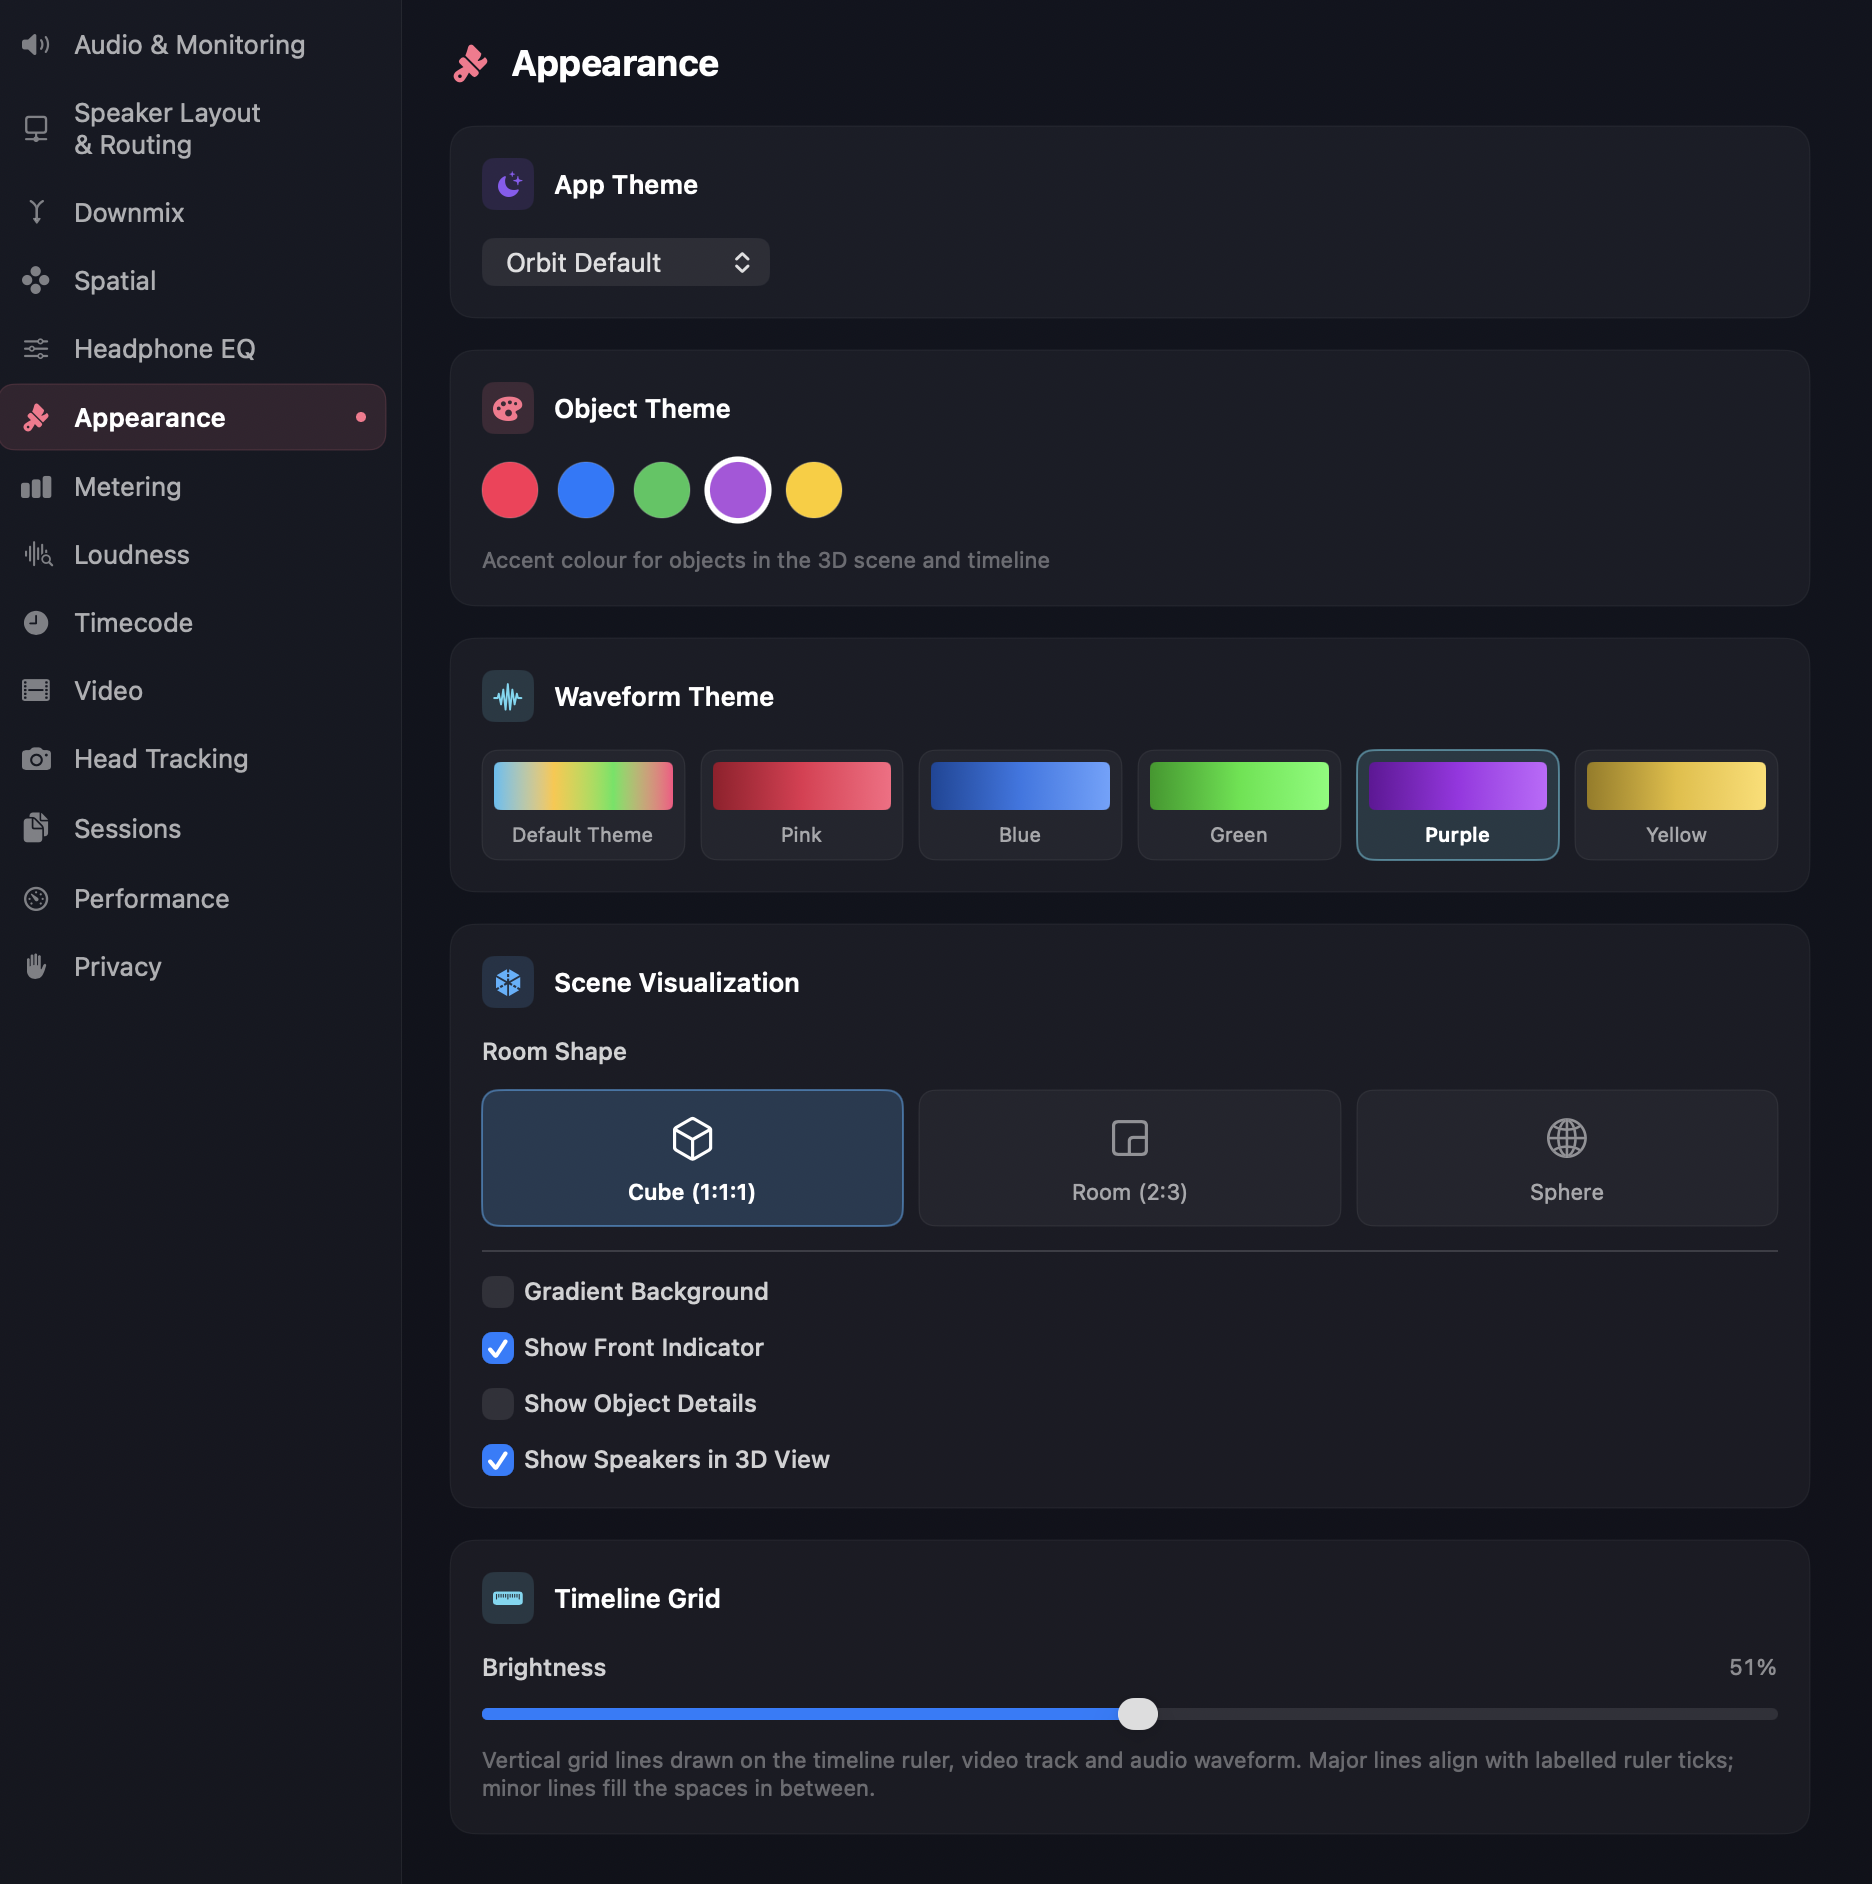
Cosmetics and layout. None of these affect the audio path — they're entirely about what the workspace looks like and how it's arranged. The defaults are tuned for a typical QC session, but the colour palettes and layout modes can save real time when you're working on multiple files in a row.
Theme
App Theme — a dropdown picker for the app's overall theme, defaulting to Orbit Default.
Pro
Additional app themes are an Orbit Pro feature. If your Pro licence is missing or expired, locked themes revert to Orbit Default on validation.
Object Theme — five accent colours (red / blue / green / purple / yellow) used for object dots in the 3D scene, object highlights in the timeline, and the master fader fill. Pick the one that contrasts best against your typical content; purple is shown selected above, but pick whichever reads clearest against your content.
Waveform Theme — six palettes for the multichannel waveform: Default Theme (a neutral rainbow gradient), plus solid Pink, Blue, Green, Purple and Yellow options that match the Object Theme accents. Each swatch previews the gradient before you select it, making busy multichannel content easier to read at a glance.
3D scene
Visual options for the SceneKit-backed 3D visualizer, grouped under Scene Visualization.
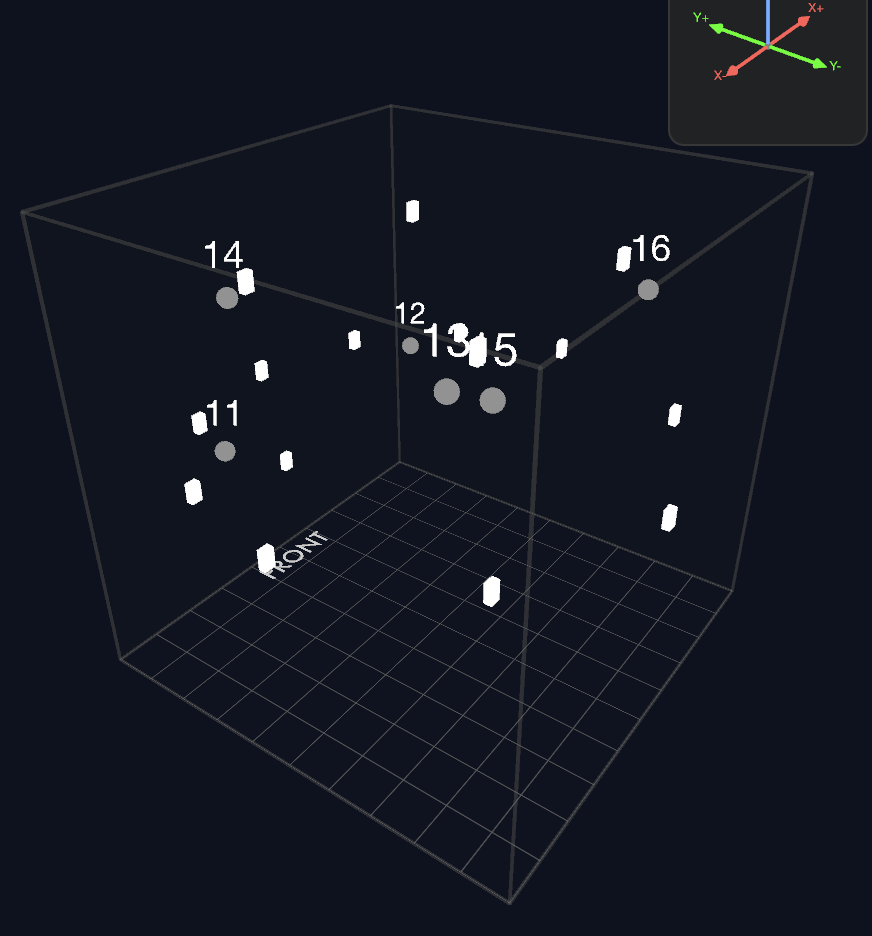
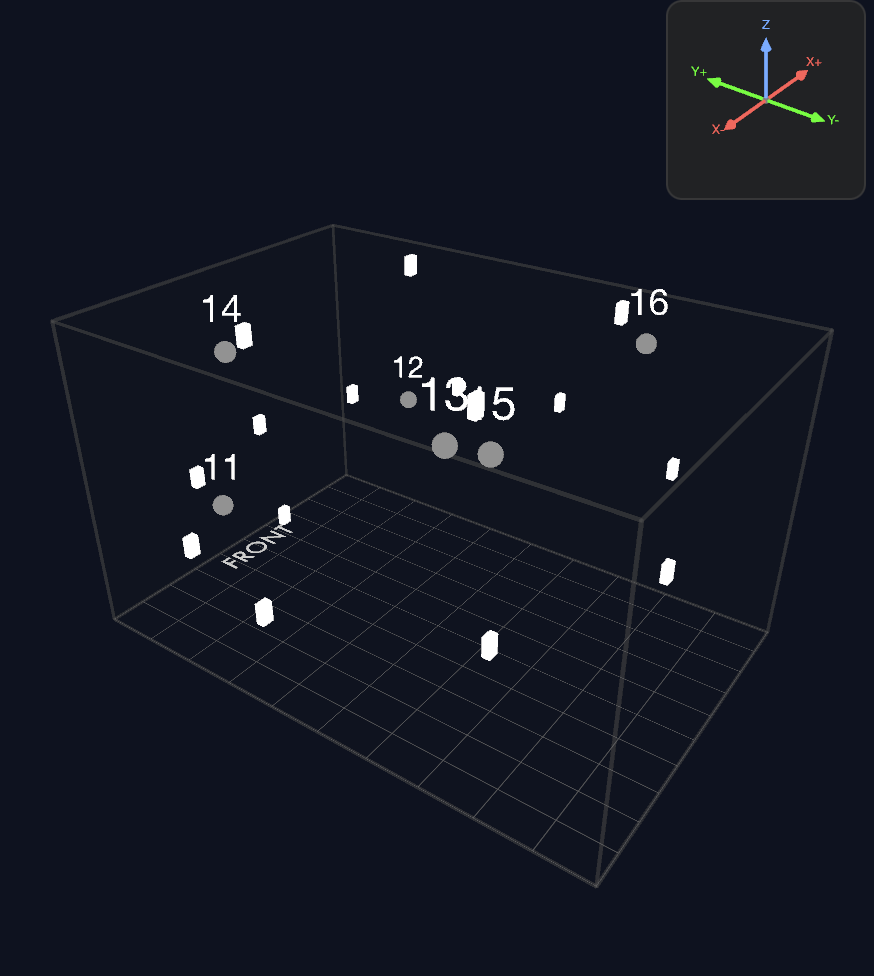
Room Shape — sets the spatial reference geometry the scene is drawn in, so the visualisation matches how your content defines position. Three options:
- Cube (1:1:1) and Room (2:3) — allocentric, room-anchored geometry. This matches Dolby Atmos Master / Cartesian content, where positions are defined relative to the room's walls (normalised into a box). Cube is a unit cube (the default); Room is a box closer to a real listening room's proportions. If you're used to the Dolby Atmos Renderer — or any other allocentric renderer — this will feel familiar.
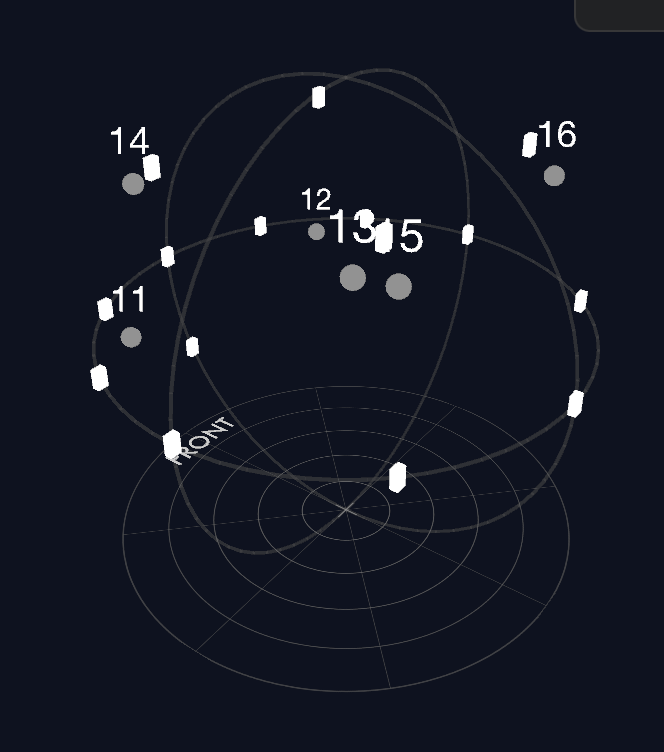
- Sphere — egocentric, listener-anchored geometry: a unit sphere with azimuth, elevation and distance measured from the listener (positive azimuth to the left, positive elevation up, radius normalised to 1). This suits the growing set of egocentric formats — EBU ADM (polar), IAMF / Google Eclipsa, MPEG-H — and Ambisonics, where direction from the listener matters more than walls. Much of spatial audio is now moving this way.
Gradient Background — switches the scene background from a flat colour to a soft gradient. Pure cosmetic. Default is off.
Show Front Indicator — draws a small marker at the front of the room (positive Y direction) so you can immediately tell which way the listener is facing. Default is on. Useful for QC; turn off for screenshots if you want a cleaner image.
Show Object Details — toggles the secondary information row shown beneath each object in the sidebar — importance, gain, and other per-object metadata. Turn it off for a more compact object list; turn it on when you want those values visible at a glance.
Show Speakers in 3D View — draws the active speaker layout's positions in the scene alongside objects. Default is on; turn off to declutter the scene when you only care about object movement.
Timeline Grid
INFO
Video View Only
Brightness — a slider controlling the visibility of the vertical grid lines drawn on the timeline ruler, video track. Major lines align with labelled ruler ticks; minor lines fill the spaces in between. Lower it toward 0% for a cleaner waveform view, or raise it when you need precise visual alignment against the ruler.
See also
- Overview — what each region of the layout actually contains.
- Monitoring — picking how audio is rendered (separate from the layout).